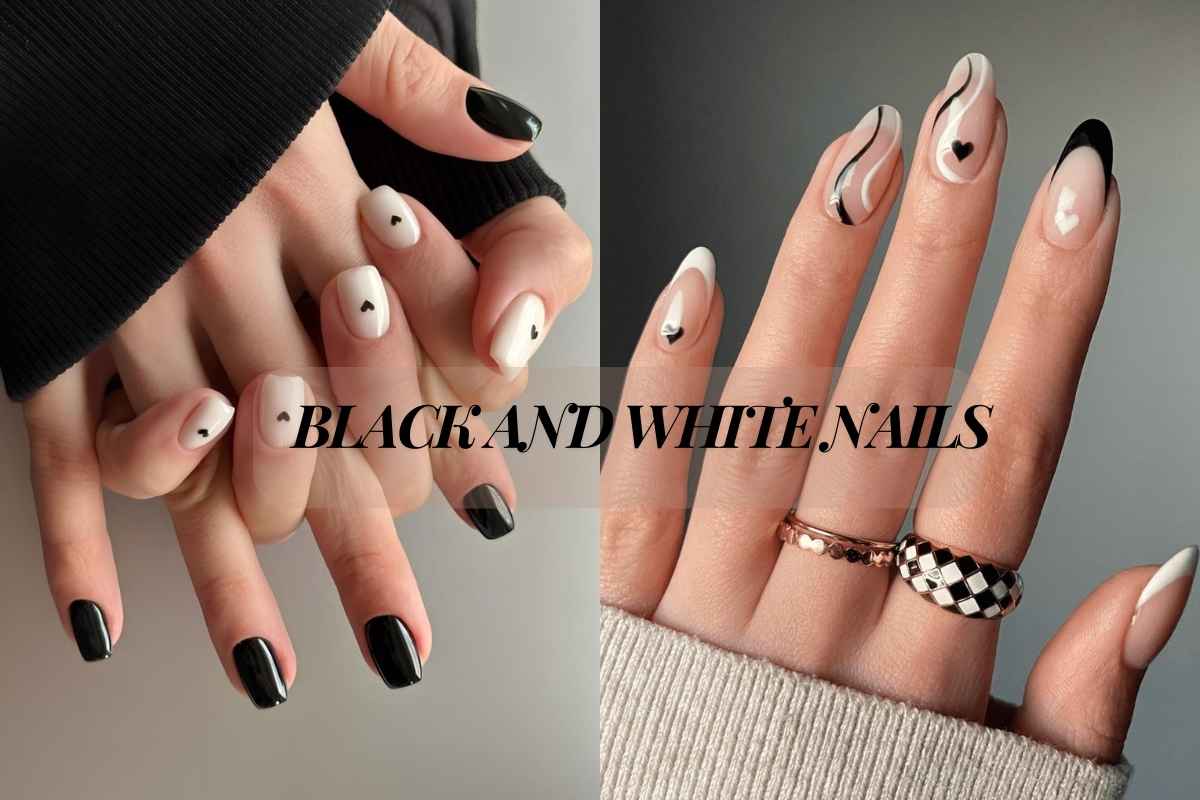
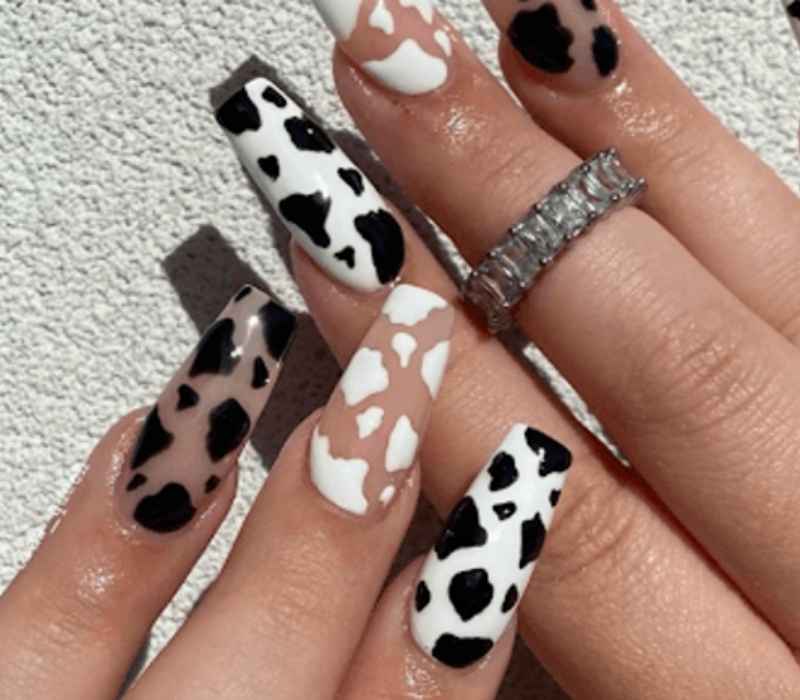
30 Best Black and White Nails Designs for 2025
If you’re looking for a bold, striking, and effortlessly chic manicure, then you’re in the right place! There’s something about the contrast of black and white that makes any black-and-white nail designs instantly sophisticated. Whether you love minimalist styles or prefer bold patterns, this monochrome trend is here to stay. Imagine rocking glossy nails that catch the light or matte nails for a sleek, modern finish—either way, your hands will be making a statement.
The best part? You don’t need to be a nail salon regular to pull off this look. From checkered nails to negative space nails or even a two-tone effect, there are endless ways to keep your manicure trendy and fashion-forward. So, are you ready to turn your nails into an elegant, high-fashion masterpiece?
Whether you go DIY or visit a pro, this artistic, avant-garde nail trend guarantees that your hands will always be the centre of attention! Now, let me show you some designs for simple black and white nails.
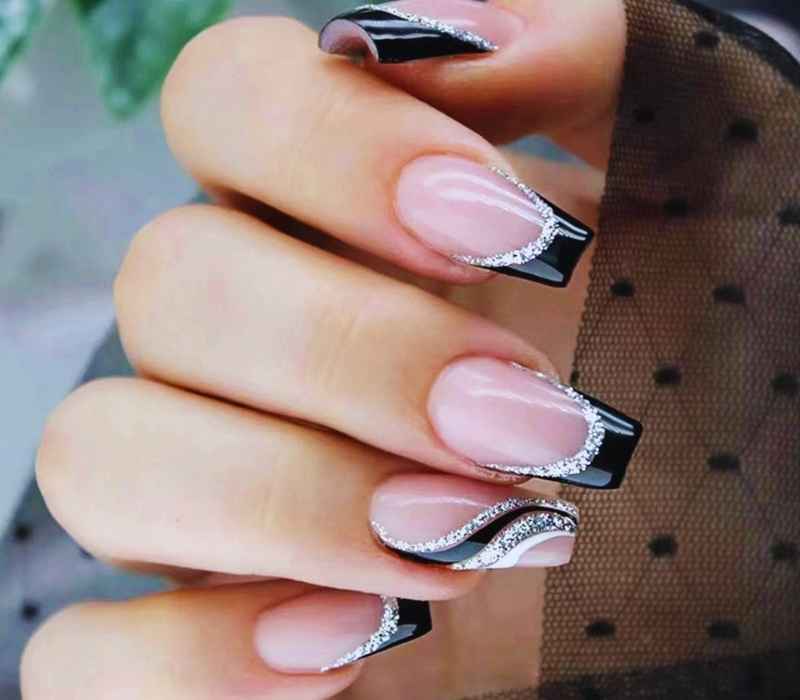
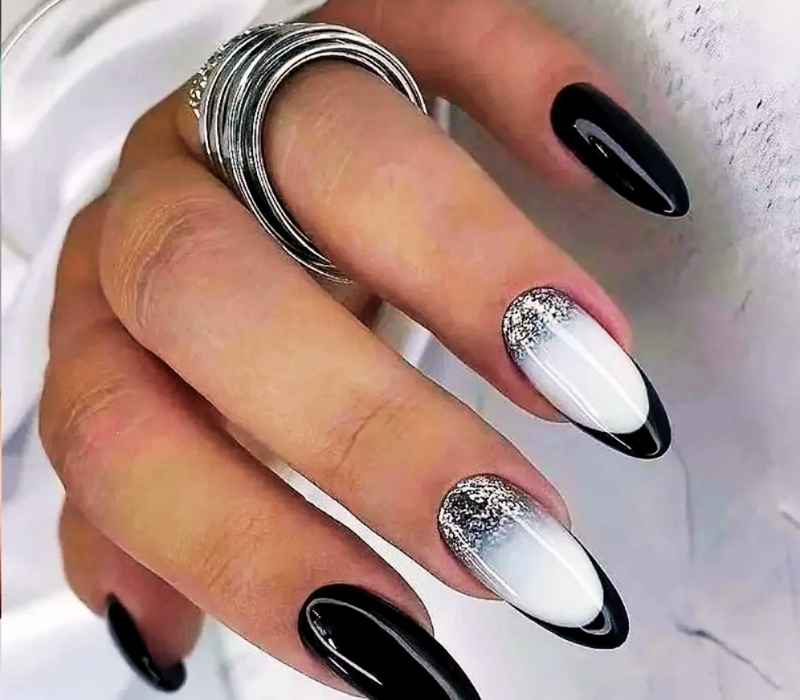
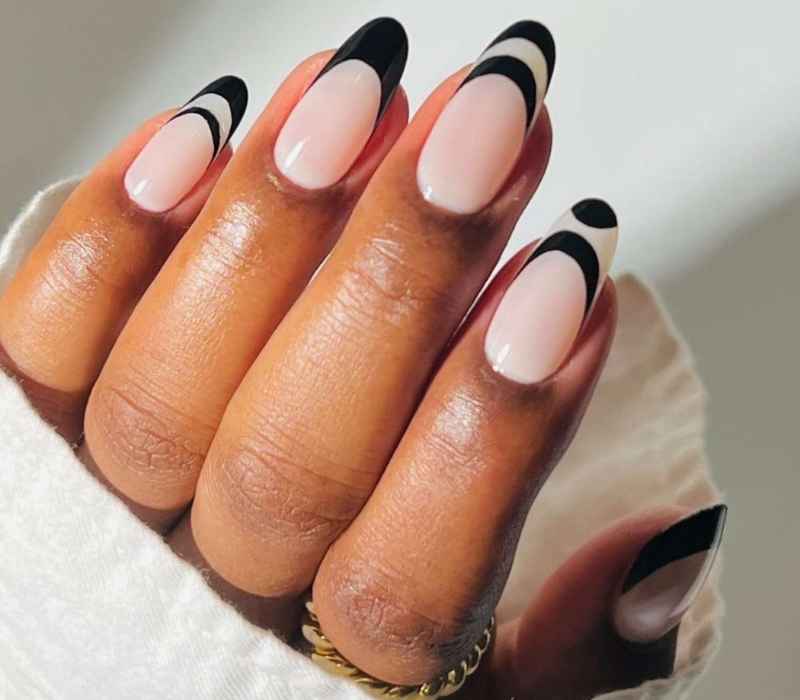
Black and White French Tips – A Chic Upgrade
If you love a classic French manicure but want something more chic and modern, you’re in for a treat! Imagine your nails with black and white double French tips—a fresh twist that adds the perfect contrast to any look.
Whether you’re into minimalist nails or love a bold statement, this trendy manicure is designed to keep your hands looking stylish and elegant.
Plus, you can play with negative space, nail art, and unique tips like checkered or geometric patterns. Whether your nails are oval or square, this fashion-forward style will have everyone asking where you got them done! Ready to elevate your manicure game?
How to Achieve This Look
1️⃣ Start with a Clean Base: Shape your nails to your desired length and style, whether it’s oval, square, or almond. Apply a clear or nude base coat for a smooth foundation.
2️⃣ Design the French Tips: Use a fine nail brush to create your French tips:
- Black Tip: Start with a sleek black line at the tip of your nails.
- White Tip: Add a thinner white line just below the black tip, creating a double-tip effect.
3️⃣ Experiment with Patterns: You can keep it classic or try creative variations like checkered, geometric, or even negative space designs.
4️⃣ Perfect the Look: Clean up the edges with a thin brush dipped in nail polish remover for sharp, crisp lines.
5️⃣ Seal It: Finish with a glossy or matte top coat to protect your design and add a professional touch.
💡 Pro Tip: Use a striping brush for crisp tips and nail guides for flawless edges. Let black dry before adding white.
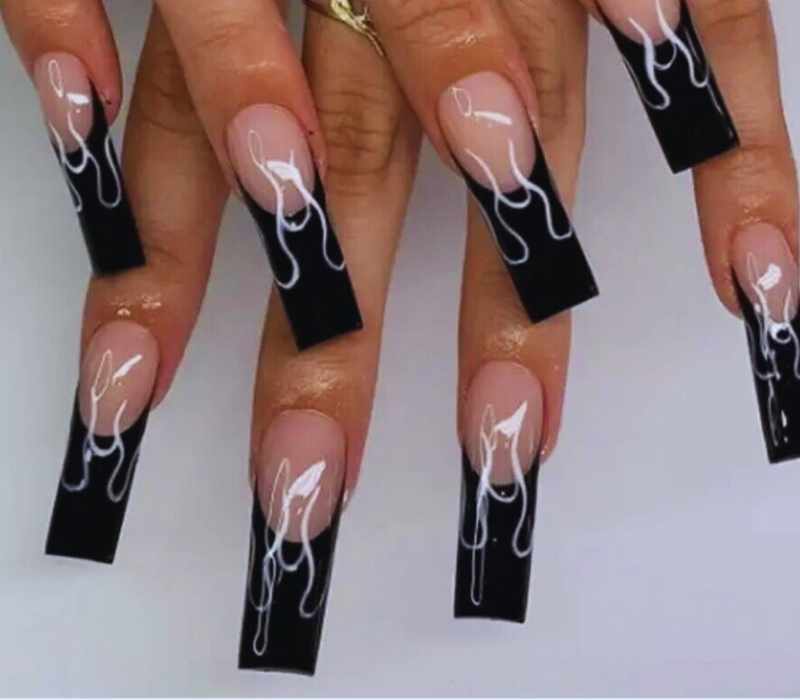
Black and White Acrylic Nails
Obsessed with black and white acrylic nails? This chic, elegant, and modern nail design is perfect for a fashion-forward look. Whether you love minimalist nails, bold nail art, or two-tone nails with a glossy or matte finish, this trend suits every style. From oval nails to square nails, your hands will always look sophisticated and on point!
5 Simple Steps for Black and White French Tips
1️⃣ Start Fresh: Shape your nails (oval, square, almond) and apply a clear or nude base coat.
2️⃣ Create the Double Tips:
- Black Line: Sweep a sleek black line at the nail tip.
- White Accent: Just below, add a thinner white line for a chic double-tip effect.
3️⃣ Get Creative: Try checkered patterns, geometric lines, or even negative space for a stylish twist.
4️⃣ Clean and Perfect: Use a thin brush dipped in remover to sharpen your design edges.
5️⃣ Seal the Deal: Choose a glossy or matte top coat for a flawless finish.
💡 Pro Tip: Use nail guides for perfect lines, even if you’re a beginner!
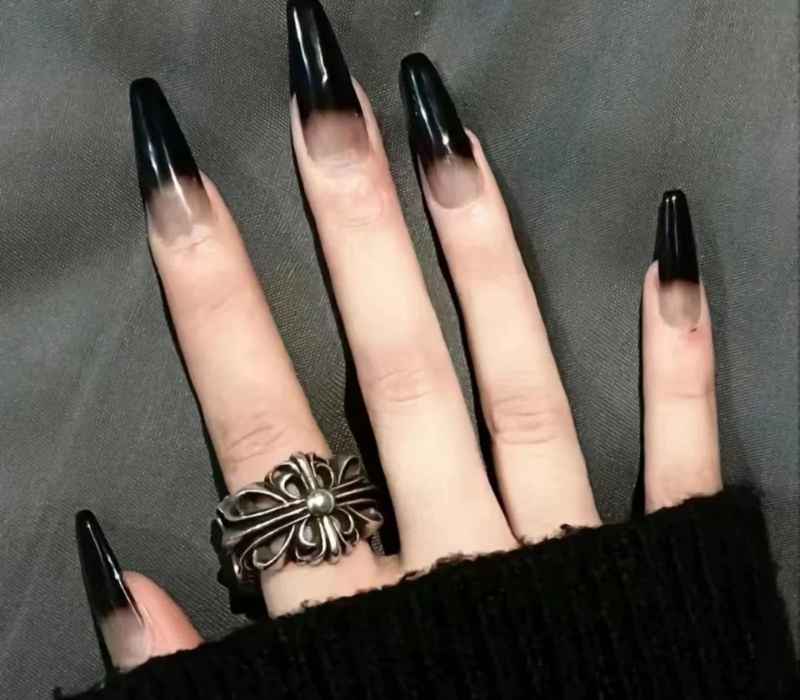
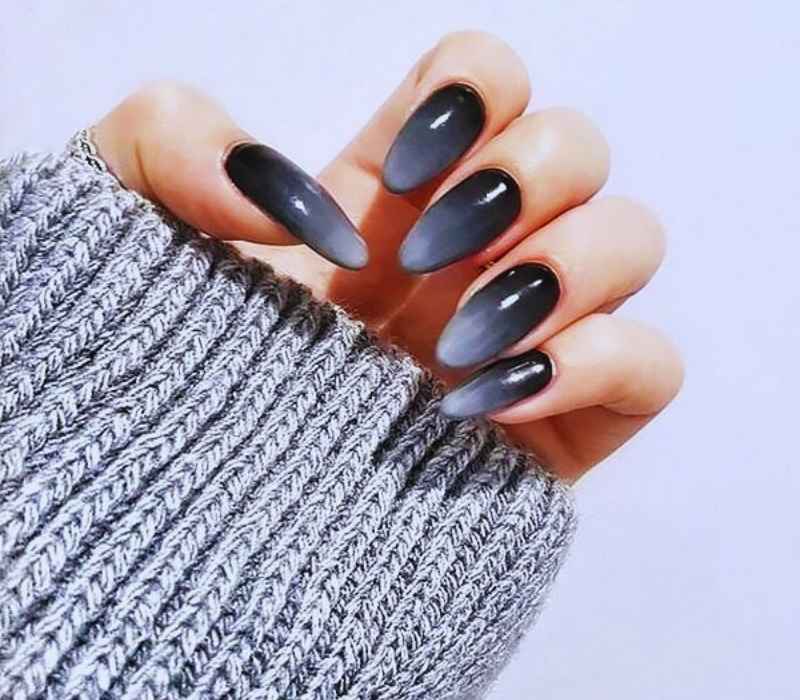
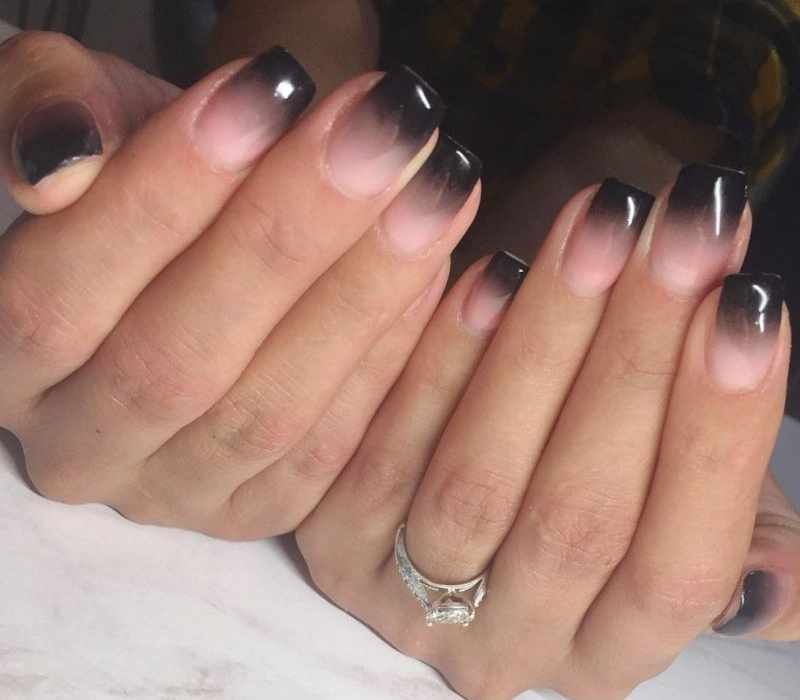
Black and White Ombre Nails
Love a bold yet elegant manicure? Black and white ombré nails blend contrast and style effortlessly! The smooth ombré gradient creates an artful colour fade, making your nails look modern, moody, and totally chic. Add geometric lines, a glitter top coat, or nail embellishments for extra flair—this look is all about making a statement.
Want even more style? Try a sharp, square nail shape, a matte fade effect, or accent nails to level up your trendy manicure. Whether you go subtle or high-contrast, this two-tone design guarantees your nails will steal the spotlight.
How to Achieve This Look
1️⃣ Prep Your Nails: Shape and buff your nails, then apply a clear base coat.
2️⃣ Create the Ombre Effect:
- Use a makeup sponge with black and white polish for a smooth gradient.
- Gently dab onto your nails until the ombre effect appears.
3️⃣ Add Your Style: Enhance the look with geometric lines, glitter, or tiny rhinestones.
4️⃣ Clean and Perfect: Use a thin brush with remover to fix any edges.
5️⃣ Seal It: Finish with a glossy or matte top coat for a polished look.
💡 Pro Tip: For a smooth ombre, use a dabbing motion and blend the colors well on the sponge before applying.
Black and White Chrome Nails
Imagine your nails reflecting light with every move—sounds stunning, right? If you’re a fan of chrome nails, then adding a black-and-white twist will make your manicure even more eye-catching.
This style blends chrome fall nails with a bold mix of contrasting tones, giving you a sleek, glam finish. Whether you’re into metallic nails or love the mirror nails effect, this moment is perfect for making a statement. Would you go for a high-shine manicure, or do you prefer a subtler touch?
How to Achieve This Look
1️⃣ Prepare Your Nails: Shape, buff, and apply a base coat for a smooth surface.
2️⃣ Apply Chrome Base: Use black or white chrome powder over a black base for a mirror-like finish.
3️⃣ Create the Contrast:
- Add a contrasting black or white chrome design.
- Try half-chrome, geometric shapes, or French tips for a unique style.
4️⃣ Clean Edges: Use a fine brush with remover to perfect the lines.
5️⃣ Seal It: Finish with a top coat for a long-lasting, glossy finish.
💡 Pro Tip: For an ultra-shiny look, use a non-wipe top coat before applying chrome powder.
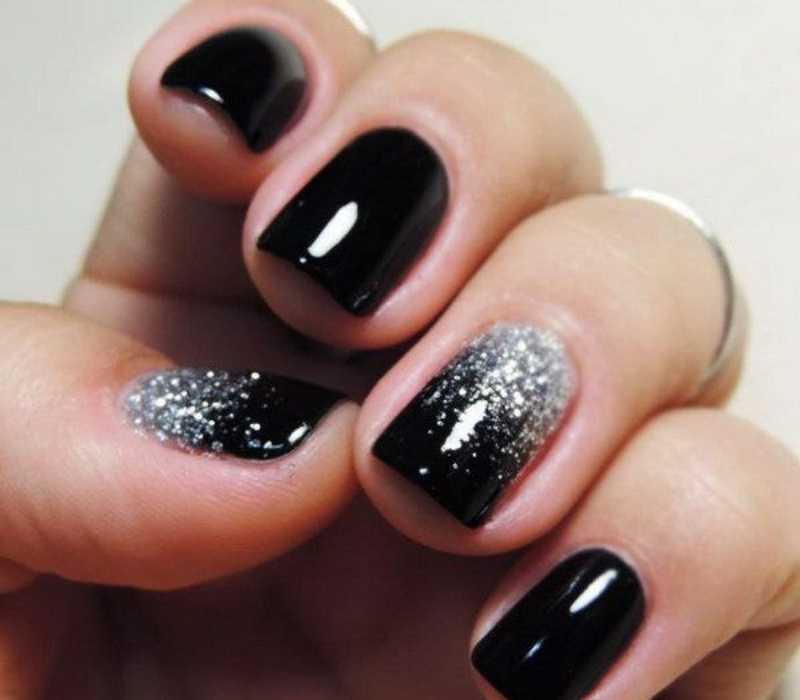
Spice It Up With Sparkle
Who doesn’t love a little sparkle? If you’re looking to elevate your black ombré nails, try adding a glittery centre line for that modern, geometric touch. It’s the easiest way to create a cool-girl definition while keeping things classy.
Whether you prefer shimmer nails or want a bold design with a glossy finish, this look is all about making your nails pop. Do you like a statement manicure, or are you more into delicate accent nails?
How to Achieve This Look
1️⃣ Prep Your Nails: Shape, buff, and apply a base coat for a smooth surface.
2️⃣ Create the Ombré Base: Use a sponge to blend black polish into a soft gradient on each nail.
3️⃣ Add the Sparkle:
- Use a fine glitter polish or nail glitter liner for a straight, shimmery centre line.
- For extra glam, go for holographic glitter or a subtle silver shine.
4️⃣ Perfect the Look: Clean any excess glitter with a thin brush dipped in polish remover.
5️⃣ Top It Off: Apply a glossy top coat for a long-lasting, polished finish.
💡 Pro Tip: Want a precise, clean sparkle line? Use nail striping tape as a guide before adding glitter.
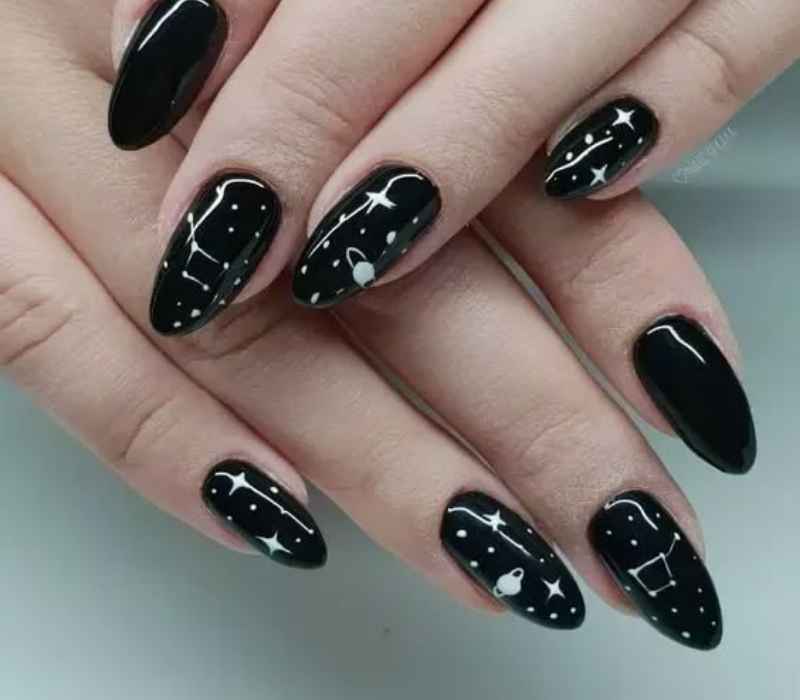
Epic Eclipse
If you’re fascinated by the moon and its cycles, why not wear it on your nails? This design features pointed nails inspired by the different lunar phases, from the new moon’s fresh beginnings to the full moon’s powerful clarity.
Whether you love celestial nails, astrology nails, or just want a cosmic design, this style is perfect for adding a mystical touch. Would you go for a soft, dreamy version or a bold night sky nail look?
How to Achieve This Look
1️⃣ Prep Your Nails: Shape your nails into pointed tips for a dramatic, celestial look. Apply a black or deep blue base coat to set the night sky theme.
2️⃣ Design the Moon Phases:
- Use white polish or silver for the moon shapes.
- Start with a thin crescent on one nail, then gradually expand to a full moon and back to a crescent on the other side.
- Add tiny white dots or silver specks around the moons for stars.
3️⃣ Clean Up: Use a fine brush dipped in polish remover to fix edges and sharpen the design.
4️⃣ Seal It: Finish with a glossy top coat for shine and durability.
Pro Tips
- Use a dotting tool for smooth, round moon shapes.
- Add shimmer polish or fine glitter to create a galaxy effect.
- Work slowly to keep the moon phases precise and balanced
Black Ombré Coffin Nails
Are you ready to turn heads? Coffin nails already bring the heat, but a black ombré design takes things to a whole new level. This sophisticated statement replaces a blush-toned base with a sexy caramel beige, creating a smooth gradient nail effect.
If you’re into high-fashion nails or love an edgy manicure, this style guarantees confidence in every gesture. Would you go for long nails for extra drama or keep them short and sleek?
How to Achieve This Look
1️⃣ Prep Your Nails: Shape your nails into coffin style—long with a squared tip. Apply a nude or caramel beige base coat.
2️⃣ Create the Ombre:
- Use a makeup sponge to blend black polish at the tips fading gently into the caramel base.
- Dab the sponge lightly to get a smooth gradient transition.
3️⃣ Clean Edges: Use a small brush dipped in polish remover to perfect the nail edges.
4️⃣ Finish Up: Apply a glossy top coat to seal your ombré and add shine.
Pro Tips
- Cure under a UV lamp if using gel polish for longer wear.
- Work in thin layers for a flawless fade.
- Use a latex barrier around nails to avoid mess during sponging.
Glitter Accent Nail
A black ombré manicure looks even more stylish when you add a glittery touch. A ring finger accent nail with black and gold creates a modern design that stands out. Whether you love a soft shimmer or bold sparkle, this look is perfect for adding a little extra flair.
How to Achieve This Look
1️⃣ Start with Black Ombre: Create a smooth black ombré base on all nails except the ring finger.
2️⃣ Prep the Accent Nail: Apply a black base coat on the ring finger.
3️⃣ Add Glitter:
- While the polish is wet, sprinkle gold glitter or apply glitter polish evenly on the accent nail.
- For a clean finish, gently press glitter flakes into the polish.
4️⃣ Seal It: Finish with a clear top coat on all nails for shine and durability.
Pro Tips
- Use a fan brush to dust off excess glitter before top coating.
- Use fine glitter for a smoother finish.
- Apply a peel-off base coat on the accent nail for easy glitter removal.
Galaxy Nails
If you want a cosmic vibe, go for almond-shaped nails with a solar system design. A black ombré base makes the planets and stars pop, creating an out-of-this-world effect. This trendy style is perfect for those who love celestial beauty at their fingertips.
How to Achieve This Look
1️⃣ Create the Base: Apply a black ombré gradient on almond-shaped nails for a deep space effect.
2️⃣ Add Stars & Planets: Use a thin brush or dotting tool to paint white and colored dots representing stars and planets.
3️⃣ Add Sparkle: Dab fine silver or holographic glitter to mimic stardust.
4️⃣ Seal Your Design: Finish with a glossy top coat to make your galaxy nails shine.
Pro Tips
- Add tiny white dots in clusters for realistic star groups.
- Use a sponge for smooth ombré blending.
- Pick bright, contrasting colors for planets to stand out.
Glitter and Gold
Not all black ombré nails have to be dramatic. A sparkly overlay with gold accents softens the look while keeping it chic. The mix of shimmer and deep tones gives off an elegant yet playful feel, making it a great choice for special occasions.
How to Achieve This Look
1️⃣ Create the Base: Apply a black ombré gradient on almond-shaped nails for a deep space effect.
2️⃣ Add Stars & Planets: Use a thin brush or dotting tool to paint white and colored dots representing stars and planets.
3️⃣ Add Sparkle: Dab fine silver or holographic glitter to mimic stardust.
4️⃣ Seal Your Design: Finish with a glossy top coat to make your galaxy nails shine.
Pro Tip: For a flawless galaxy look, use a makeup sponge for smooth, blended stars and planets.
Matte Black Ombré
A matte polish can transform black ombré nails into a bold statement. This sleek, abstract line design adds an artistic touch, making your nails look like a true masterpiece. If you prefer a modern yet edgy style, this is the perfect look for you.
How to Achieve This Look
1️⃣ Prep Your Nails: Shape your nails and apply a base coat to protect them.
2️⃣ Create the Ombré: Use a makeup sponge to apply black polish at the tips, blending it towards the base.
3️⃣ Add Abstract Lines: Use a thin nail brush and black polish to draw artistic lines for a stylish twist.
4️⃣ Matte It Up: Apply a matte top coat for a smooth, non-shiny finish.
Pro Tip:
Use a liquid latex barrier around your nails for easy cleanup while creating the ombré effect.
Dotted Nails
Elevate the black ombré trend with dots placed at the base of the nail. This design creates a balanced look, especially when paired with stiletto nails. If you love minimalist designs that still stand out, this is a must-try.
How to Achieve This Look
1️⃣ Start with the Base: Shape your nails and apply a clear or nude base coat.
2️⃣ Create the Ombré: Use a makeup sponge to blend black polish at the tips, creating a smooth gradient.
3️⃣ Add Dots: Use a dotting tool or the end of a bobby pin to carefully place dots at the base of each nail.
4️⃣ Seal It: Apply a glossy top coat to protect your design.
Pro Tip:
Use different dot sizes for a playful, artistic effect.
Reverse French
For a creative twist, go for black-and-white reverse French tips. Mix things up with side tips or sharp edges instead of the classic style. This look is for those who love bold and high-fashion nails with a modern touch.
How to Achieve This Look
1️⃣ Prep Your Nails: Shape and file your nails to your desired shape (oval, almond, or square). Apply a clear base coat.
2️⃣ Apply Base Color: Use a white or nude polish as your base and let it dry completely.
3️⃣ Create the Reverse Tip: Use a fine nail brush to draw a black semi-circle or side tip at the nail’s base.
4️⃣ Perfect the Edges: Use a thin brush dipped in nail polish remover to clean any smudges.
5️⃣ Seal It: Apply a glossy top coat for a flawless, long-lasting finish.
Pro Tip:
Try different shapes for your reverse tips, like diagonal lines or double layers, for a stylish upgrade.
Swirly Nails
A nude base with black and white swirls creates a soft yet attention-grabbing effect. This abstract design feels like an art piece at your fingertips—perfect for anyone who loves a minimalist but stylish look.
How to Achieve This Look
1️⃣ Prep Your Nails: Shape and file your nails to your desired length and shape. Apply a nude or clear base coat.
2️⃣ Create the Swirls: Use a fine nail art brush dipped in black polish to draw elegant swirl patterns. Repeat with white for contrast.
3️⃣ Adjust the Design: Make your swirls thick, thin, or overlapping for a personalized abstract look.
4️⃣ Perfect Your Swirls: Use a cleanup brush with nail polish remover to sharpen the edges of the design.
5️⃣ Seal It: Finish with a glossy top coat for a smooth, long-lasting finish.
Pro Tip: Mix matte and glossy top coats on different nails for a unique textured effect.

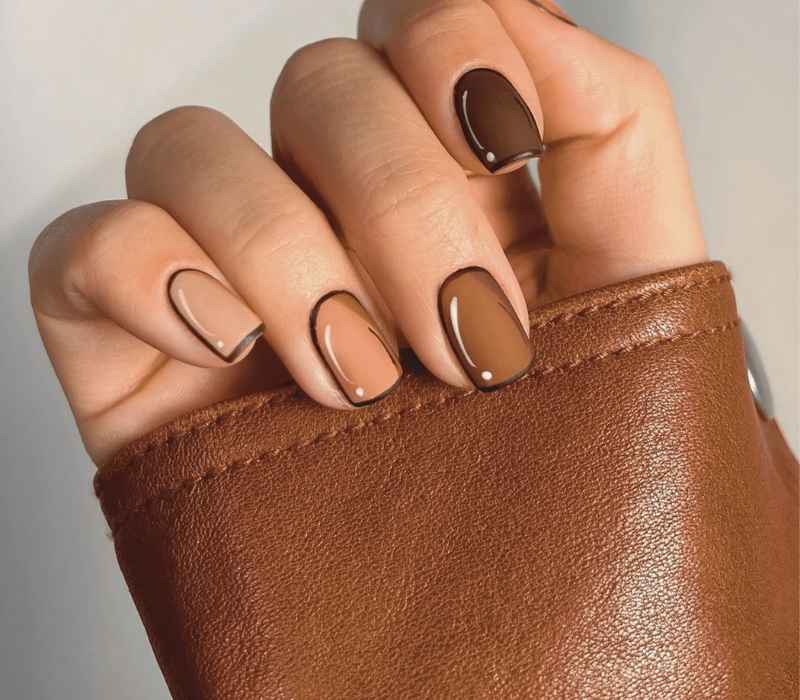
Brown and Black – A Soft & Natural Ombré Look
If you love a subtle yet stylish nail design, try a taupe-y brown blended into a black ombré effect for a natural fade. This colour combo softens the contrast, making it perfect for a sweet almond nail shape that feels effortlessly elegant. Would you try this chic and modern ombré?
How to Achieve This Look
1️⃣ Prep Your Nails: Shape and file your nails to a soft almond shape. Apply a clear base coat.
2️⃣ Create the Ombré: Use a makeup sponge to dab a taupe-brown polish starting from the base and blend it gently into black at the tips.
3️⃣ Perfect the Gradient: Repeat the sponge application until you achieve the desired depth of color.
4️⃣ Smooth the Blend: Use a sheer nude or light brown polish to smooth the transition.
5️⃣ Seal Your Design: Apply a glossy top coat for a sleek finish.
Pro Tip: Choose a warm, coffee-toned brown for a cozy fall vibe.
READ ALSO: 19 Brown Nail Looks to Wear In 2025
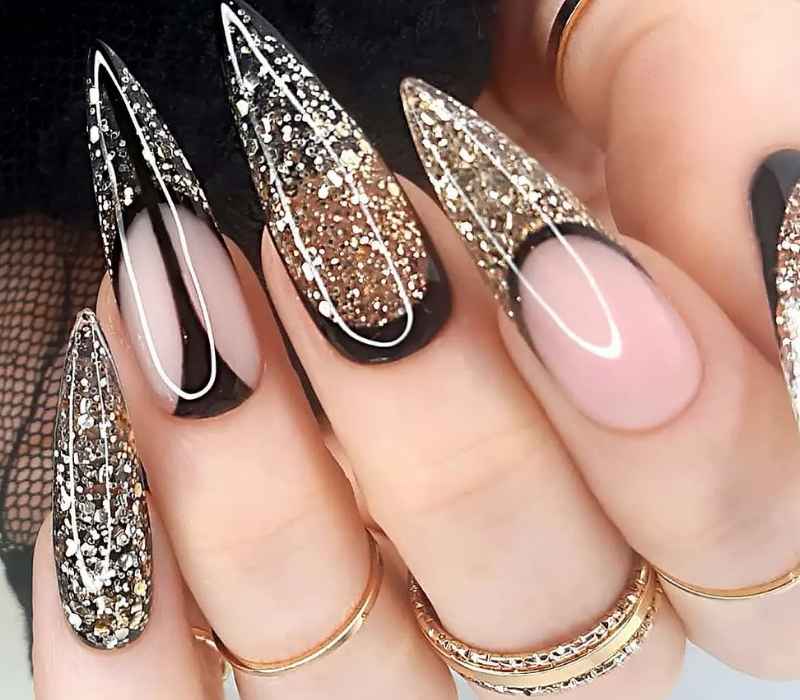
Multi-Color Nails with Ombré and Gold Line Design
Why settle for one colour when you can have it all? A curated mix-and-match mani brings a stylish edge to your short, natural nails. Imagine a rose gold palette, a glittery pinky, a bold metallic stripe on a black base, and a sleek blush-to-black ombré nail—all working together in perfect harmony. Which colour combo would you love the most?
How to Achieve This Look
1️⃣ Prep Your Nails: Shape and file your natural nails. Apply a clear base coat.
2️⃣ Choose Your Colors: Pick a mix of shades like blush, rose gold, black, and glitter pink.
3️⃣ Create the Ombré Effect: Use a sponge to blend blush into black on one nail for a soft gradient look.
4️⃣ Add Gold Accents: Use a fine brush or nail tape to create a sleek gold line on one or two nails.
5️⃣ Design Each Nail Uniquely: Add glitter to your pinky, a metallic stripe on the black base, and keep one nail solid for balance.
6️⃣ Seal the Look: Apply a glossy top coat for a long-lasting finish.
Pro Tip: Use nail stickers for precise gold lines without any mess.

Blue and Black Ombré – A Bold Pop of Color
For those who love statement nails, a black ombré with a royal blue tip is a must-try. The blue-toned pink base enhances and amplifies the deep verve of blue, making your nails truly pop. Would you go for this vibrant and electric look?
How to Achieve This Look
1️⃣ Prep Your Nails: Shape and file your nails, then apply a clear base coat for protection.
2️⃣ Apply Black Polish: Start with a black base on all nails, letting it dry completely.
3️⃣ Create the Ombré Effect: Use a makeup sponge with blue polish on the tip and gently dab it on the nail, blending it into the black base.
4️⃣ Perfect the Gradient: Repeat until you achieve your desired intensity. Clean up the edges with a fine brush.
5️⃣ Top It Off: Seal with a glossy top coat for a smooth, polished look.
Pro Tip: Use a metallic blue for an even bolder, light-catching effect.
Make It Metallic – Shine Like Never Before
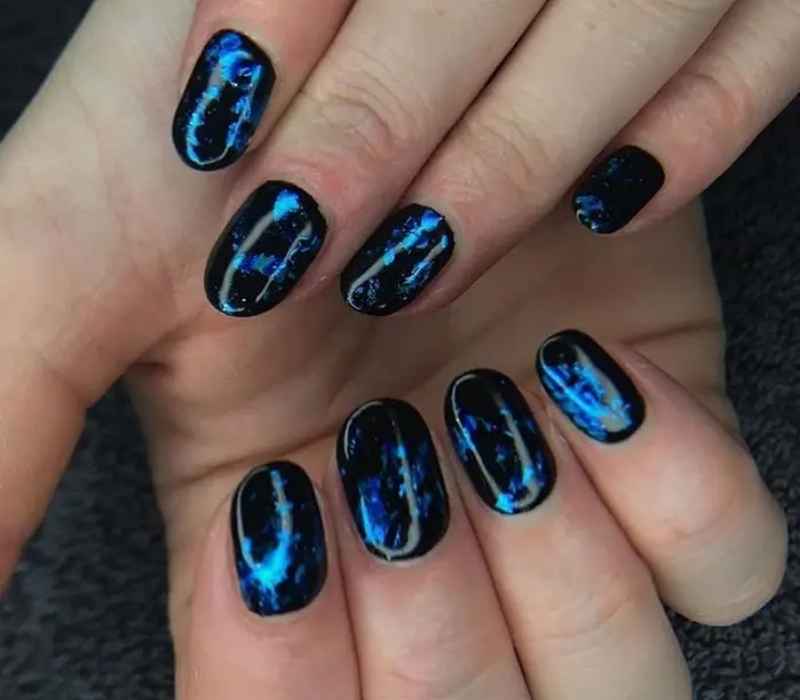
Take your classic black ombré manicure up a notch with a holographic black twist. The chrome overlay gives it a shining moment, adding a futuristic edge that’s both trendy and unique. If you love nails that catch the light in every angle, this one’s for you! Ready to shine?
How to Achieve This Look
1️⃣ Start with a Clean Base: Shape and file your nails, then apply a clear base coat for protection.
2️⃣ Apply Black Polish: Use a deep black polish as your base and let it dry completely.
3️⃣ Create the Ombré Effect: Use a makeup sponge to blend silver or holographic chrome polish onto the tips, creating a gradient.
4️⃣ Add Chrome Powder: For extra shine, gently rub a holographic chrome powder over the gradient using a soft applicator.
5️⃣ Seal the Shine: Finish with a glossy top coat for a mirror-like finish.
Pro Tip: Use a makeup sponge for a smoother ombré blend.
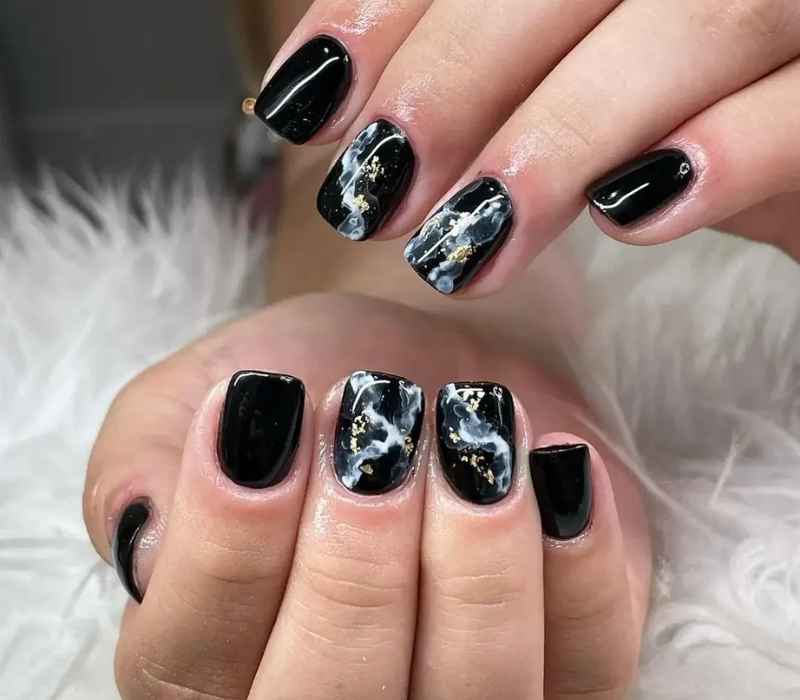
Marble Swirl Pattern – Elegant & Artsy
If you want your nails to be a conversation starter, black marble swirls on a white base are the way to go. These wild swirls create a dramatic, high-fashion look while keeping things sleek and sophisticated. Would you rock this artistic design?
How to Achieve This Look
1️⃣ Start with a Clean Base: Shape your nails and apply a clear base coat for a smooth surface.
2️⃣ Apply White Polish: Coat your nails with a solid white polish and let it dry completely.
3️⃣ Create the Marble Swirls: Use a fine nail brush dipped in black polish. Gently draw wavy lines, then use a thin brush with acetone to soften and blend the edges for a natural marble effect.
4️⃣ Add Shine: For extra elegance, use a glossy top coat to seal your design and add shine.
Pro Tip: Use a thin, pointed brush for more control over your marble swirl design.
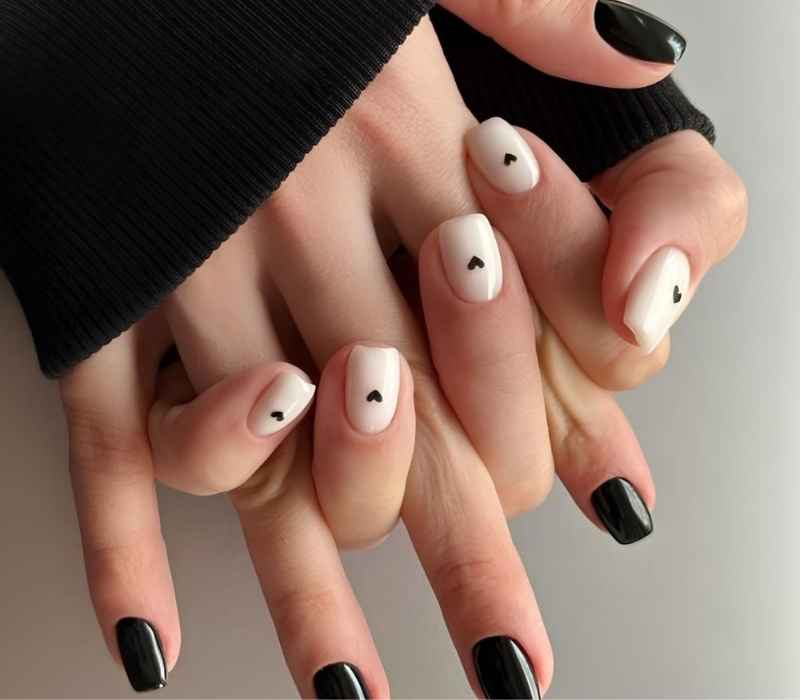
Heart Accents – Cute & Minimalist
For a delicate and romantic vibe, a black and white design with tiny hearts is the ultimate low-key cute style. The black hearts pop beautifully on a balanced mix of alternating black nails, creating a playful yet classy look. Would you wear this for your next manicure?
How to Achieve This Look
1️⃣ Start with a Clean Base: Shape your nails and apply a clear base coat for a smooth surface.
2️⃣ Apply White Polish: Coat your nails with a solid white polish and let it dry completely.
3️⃣ Create the Marble Swirls: Use a fine nail brush dipped in black polish. Gently draw wavy lines, then use a thin brush with acetone to soften and blend the edges for a natural marble effect.
4️⃣ Add Shine: For extra elegance, use a glossy top coat to seal your design and add shine.
Pro Tip: Use a thin, pointed brush for more control over your marble swirl design.
Curved Lines – Sleek & Modern Elegance
For those who love clean, minimal designs, white nails with slick black curved lines create a serious flow that feels sophisticated yet edgy. This design is all about balance and movement—perfect for an effortless, modern manicure. Are curved lines your style?
How to Achieve This Look
1️⃣ Prepare Your Nails: Shape and clean your nails, then apply a white base coat for a crisp background.
2️⃣ Create Curved Lines: Using a thin nail art brush or nail art pen, carefully draw smooth black curved lines on each nail. Keep the lines light and flowing.
3️⃣ Let Dry: Allow the design to dry fully to avoid smudging.
4️⃣ Seal the Design: Apply a clear top coat to protect your nails and add shine.
Pro Tip: Use a fine detail brush and steady your hand by resting it on a flat surface to get clean, smooth lines every time.

Double Frenchies
Want a modern twist on the classic French tips? Try black and white double French tips for a bold yet sleek look. This design adds just the right amount of contrast, making your manicure stand out effortlessly. Would you go for thin, delicate lines or a thicker, more dramatic edge?
How to Achieve This Look
1️⃣ Prep Your Nails: Shape your nails and apply a clear or nude base coat.
2️⃣ First French Tip: Use black polish and a thin brush to paint the first line at the tip of each nail.
3️⃣ Second French Tip: Add a white line just below or above the black tip for that double-line effect.
4️⃣ Clean Edges: Fix any mistakes with a small brush dipped in nail polish remover for sharp lines.
5️⃣ Seal & Shine: Finish with a clear top coat to protect your design and add gloss.
Pro Tip: Use nail guides or tape to keep your double tips perfectly even and symmetrical.
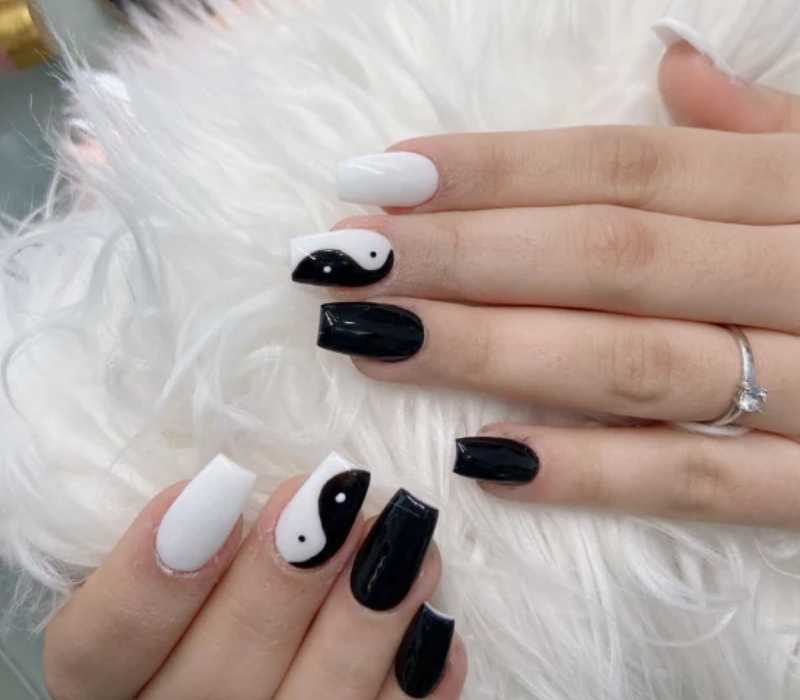
Half and Half black and white nails
Looking for balance in your nails? The yin-and-yang effect of one-hand black and one-hand white is perfect. This ombré nail style gives a bold contrast, and you can even add moon details for a mystical touch. Would you keep it minimal or add your creative spin?
How to Achieve This Look
1️⃣ Prep Your Nails: Shape and clean your nails. Apply a base coat for smoothness.
2️⃣ Paint Each Hand: Paint all nails on one hand black, and the other hand white. Use two coats for full coverage.
3️⃣ Add Details: Use a thin brush or stickers to add moon or celestial accents on any nails you want to highlight.
4️⃣ Clean Up: Remove any polish mistakes with a small brush dipped in remover for sharp edges.
5️⃣ Seal: Apply a top coat to protect your design and add shine or matte finish.
Pro Tip: Use quick-dry polish to speed up the process and avoid smudges between switching hands.
Periwinkle Perfection
Tired of neutral nails? Swap the usual nude base for periwinkle to make a colourful statement! This soft, trendy shade blends beautifully with black ombré nails, keeping things stylish yet playful. How would you mix colour into your next manicure?
How to Achieve This Look
1️⃣ Prep Your Nails: Clean and shape your nails. Apply a clear base coat.
2️⃣ Paint Periwinkle Base: Apply two coats of periwinkle polish on all nails except the accent nail(s).
3️⃣ Create Black Ombré Accent: On one or two nails, use a sponge to blend black polish into the periwinkle base for a smooth ombré effect.
4️⃣ Clean Edges: Use a small brush dipped in remover to tidy up around nails.
5️⃣ Finish: Seal with a glossy or matte top coat to protect and enhance shine.
Pro Tip: Dab the sponge gently when creating the ombré to avoid harsh lines and get a smooth colour blend.
Confetti Ombré
Love glitter? A jet-black base with chunky glitter polish creates a fun confetti effect—perfect for parties or just adding sparkle to your day. The smooth ombré fade makes it bold yet elegant. Would you go for a subtle shimmer or full-on glam?
How to Achieve This Look
1️⃣ Prep Your Nails: Clean, file, and shape your nails. Apply a clear base coat.
2️⃣ Apply Black Base: Use two coats of jet-black polish for a smooth, dark foundation.
3️⃣ Add Glitter Gradient: Using a sponge, dab chunky glitter polish from the tips towards the middle for a soft ombré effect.
4️⃣ Layer for Intensity: For more sparkle, add an extra layer of glitter polish.
5️⃣ Seal and Shine: Finish with a glossy top coat to lock in the sparkle.
Pro Tip: Use a mix of fine and chunky glitter for a richer confetti effect.
Neutral Base and High Gloss
If you love a luxe look, this style is for you! The square shape gives a sophisticated feel, while a demure pink base creates the perfect contrast for the black gradient. The hyper-glossy finish makes these wet-look nails stand out, adding a polished and modern touch.
How to Achieve This Look
1️⃣ Prep Your Nails: Clean, file, and shape them into a square shape. Apply a base coat.
2️⃣ Apply Neutral Base: Use a soft pink or nude polish for a smooth, elegant base.
3️⃣ Create Gradient: Using a makeup sponge, gently dab black polish at the tips for a gradient effect.
4️⃣ Enhance the Shine: Seal with a high-gloss top coat for that wet-look finish.
5️⃣ Clean Edges: Use a fine brush dipped in nail polish remover for clean lines.
Pro Tip: For an ultra-glossy look, use a gel top coat and cure under a UV lamp.
READ ALSO: Trendy Neutral Summer Nails for a Classy Look
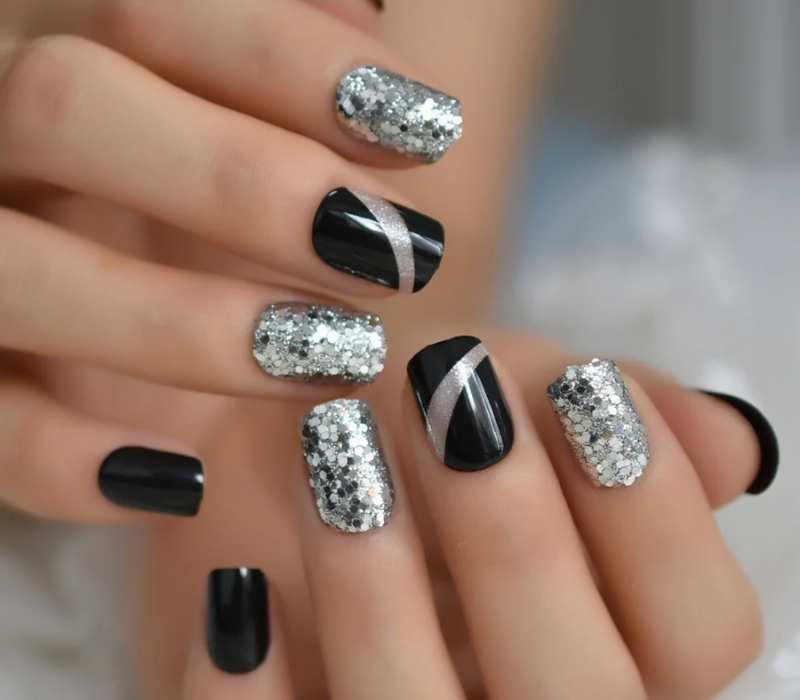
Black and Silver Sparkle
For those who love a little extra glam, this ultra-glamorous style blends fine silver glitter with a metallic base, creating a dazzling effect. The black ombré fades beautifully into the sparkles, making it a perfect choice for a bold night-out look or even an NYE mani. The sparkly pigments add just the right amount of shimmer while keeping the dark gradient elegant.
How to Achieve This Look
1️⃣ Prep Your Nails: Shape your nails and apply a clear base coat.
2️⃣ Apply Black Base: Use a rich black polish on all nails. Let it dry.
3️⃣ Add Silver Sparkle: Use a glitter polish at the tips, gently blending towards the middle for an ombré effect.
4️⃣ Build the Shine: Apply extra glitter for a more dramatic look.
5️⃣ Seal and Shine: Finish with a high-gloss top coat for a flawless, glassy finish.
Pro Tip: For a perfect ombré effect, use a makeup sponge to blend the glitter seamlessly.
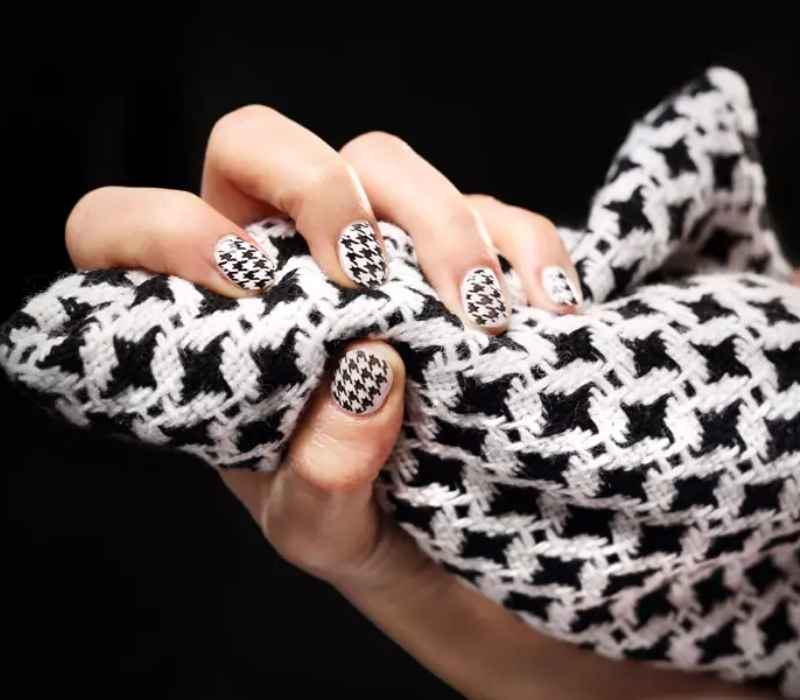
Houndstooth Elegance
Ever had that moment when you walk into a room, and all eyes are on you? That’s the power of a fashion icon look, and black nails with a houndstooth pattern print deliver just that.
This retro power move is for those who love vintage vibes with a modern edge. Whether you go for a full-on houndstooth design or just an accent nail, this pattern is all about boldness, confidence, and a touch of sophistication.
How to Achieve This Look
1️⃣ Prep Your Nails: Shape and clean your nails, then apply a clear base coat.
2️⃣ Base Color: Use a glossy black polish as your base and let it dry completely.
3️⃣ Create Houndstooth Pattern: Use a fine nail brush or houndstooth nail stickers for a clean look. Start with tiny white squares, then add diagonal lines for the classic pattern.
4️⃣ Accent Nail Option: For a trendy touch, keep the pattern on one or two nails while keeping the others solid black.
5️⃣ Top Coat: Seal with a glossy top coat for a lasting shine and protection.
Pro Tip: Not confident in freehand designs? Use nail stamping plates for a flawless houndstooth pattern.
Chrome Luxe Lines
There’s something about matte black mixed with glossy white nails and gold chrome lines that just feels powerful. It’s like wearing your favourite designer outfit—effortlessly chic yet daring. These chrome details add the perfect amount of glam, making your nails stand out without being over the top. If you want a manicure that helps you flex on everyone while keeping it classy, this is the one to go for.
How to Achieve This Look
1️⃣ Prep Your Nails: Start with clean, shaped nails and apply a clear base coat.
2️⃣ Base Colors: Apply matte black polish on some nails and glossy white on others. Allow them to dry.
3️⃣ Add Chrome Lines: Use gold chrome nail tape or a fine nail brush with gold chrome polish to create sleek, straight lines. Vertical, horizontal, or diagonal—choose your style.
4️⃣ Accent Touch: Keep one or two nails solid for a balanced look or add tiny chrome dots for extra flair.
5️⃣ Seal the Design: Apply a glossy top coat over the chrome lines and a matte top coat over the matte black for a lasting finish.
Pro Tip: Use striping tape for clean, crisp chrome lines without any mess.

No matter your style—bold, chic, or effortlessly elegant—black and white nail designs offer endless ways to express yourself. Whether you’re drawn to minimalist styles, glossy nails, or avant-garde patterns, these timeless shades never go out of fashion.
So, whether you prefer a DIY manicure or a salon-perfect look, these high-fashion, statement-making nails will always keep your hands in the spotlight. Ready to embrace the monochrome magic?


