

Light Pink Nails with Design Ideas You’ll Love in 2025
You know those nail shades you always come back to, no matter the trend? For me, it’s always been light pink—and chances are, by the end of this, you’ll see why. Light pink nail designs are timeless, soft, and effortlessly chic.
They pair with everything in your closet and look flawless on any nail shape, whether you’re into almond or coffin tips.
What makes nail designs light pink so appealing is how they mimic the natural nail bed, giving that clean, polished vibe with barely any effort.
Even when life gets hectic, a few chips in a sheer polish aren’t a big deal. And if you’re ready to play, this shade’s versatility shines—go bold with a bubblegum hue, sleek with a chrome finish, or feminine with delicate bow decals.
Around Valentine’s Day, I love layering a romantic rose tone and adding pink hearts—it’s sweet without being too much. And if you’re craving something classic, a French tip nails never fails, especially when updated with a subtle pastel twist.
I’ve got over 20 looks saved that prove it: when it comes to style and staying power, light pink nail designs always come out on top.
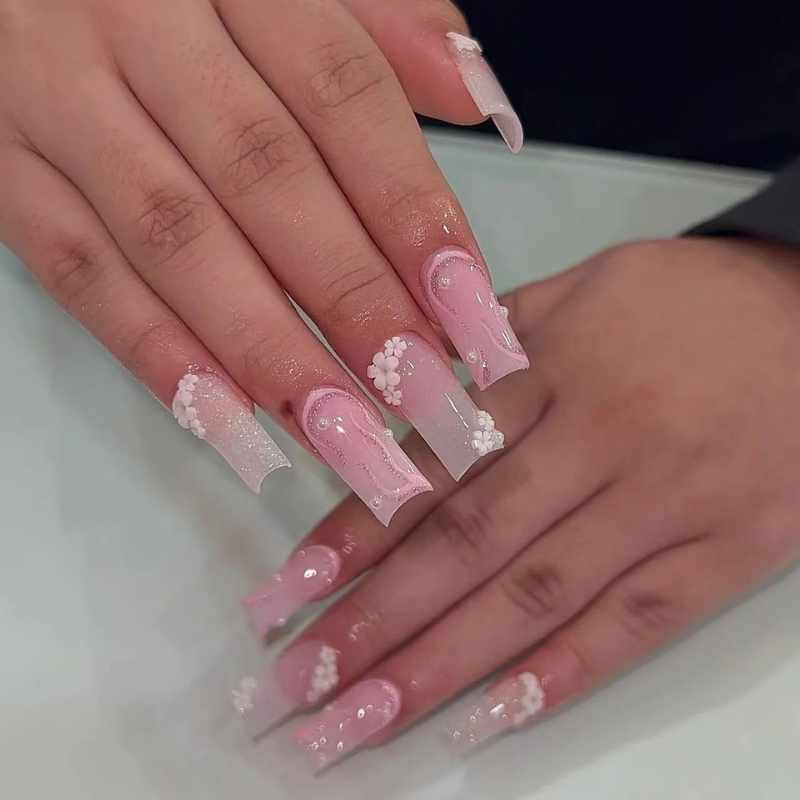
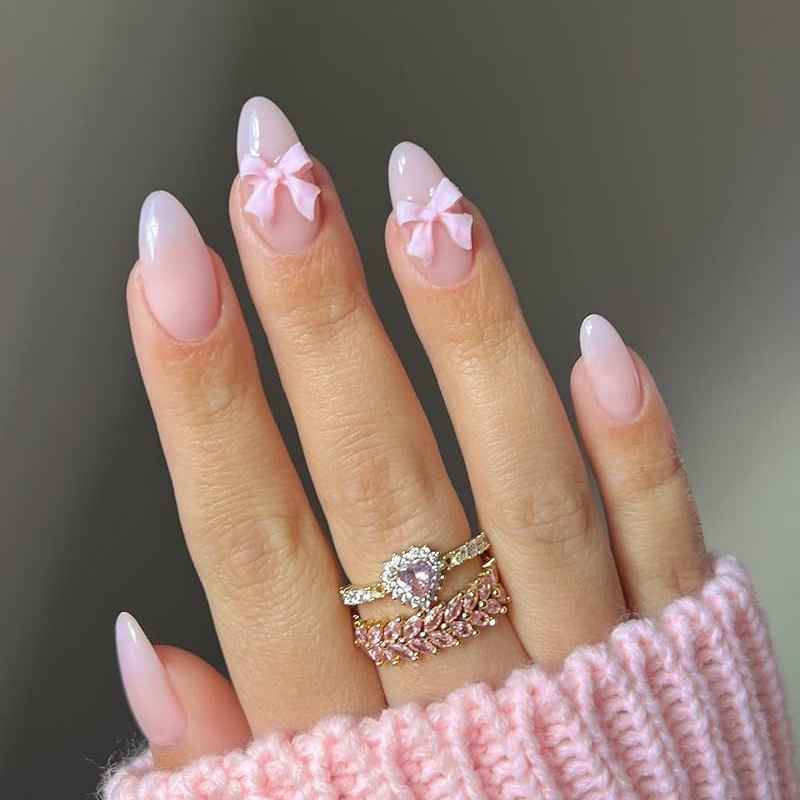
Decal for Days
Sometimes, all it takes to elevate a nail look is a little detail. 3D decals like bows and hearts make baby pink nails feel special. They add a shimmery, feminine touch, turning a simple design into something stunning.
I love how these cute little accents bring my nails to life. Whether I want them soft or playful, they always make me feel more glad when I glance at my hands.
How to Get This Look
Transform your baby pink nails with 3D decals like bows and hearts for a chic, feminine touch. Here’s how to do it easily:
- Prep Nails: Clean, file, and shape.
- Apply Baby Pink Polish: Use two thin coats.
- Add 3D Decals: Place with tweezers while polish is slightly tacky.
- Secure with Top Coat: Lock the design with a glossy finish.
Pro Tip: For extra shine and durability, use a clear gel top coat.
Read Also: 18 Pink Fall Nail Ideas That Are Too Pretty To Miss
Citrus Twist
Want to feel like summer’s here? Try a lemon slice on your nails. This cheerful design gives me beach nail vibes and reminds me of spring break in Portofino. The fresh citrus vibe instantly makes me feel ready to go.
I keep the rest of the nails minimal to let the lemon pop, and trust me, it gets noticed. It’s fun and the perfect energy boost in nail form.
How to Achieve This Look
- Prepare Your Nails: Start with clean, shaped nails. Push back cuticles for a neat base.
- Apply Base Coat: Use a clear base coat to protect your nails.
- Paint with Light Pink Polish: Add two thin coats of light pink polish. Let each coat dry.
- Add Gold Accents: Use gold foil, metallic nail tape, or gold decals. Place them on the nail tips, edges, or create delicate patterns.
- Seal with Top Coat: Use a glossy top coat to protect your design and add shine.
Pro Tip: For a luxury look, try using gold leaf or metallic gold polish.
Read Also: 20+ Summer Nail Designs That Will Turn Heads In 2025!
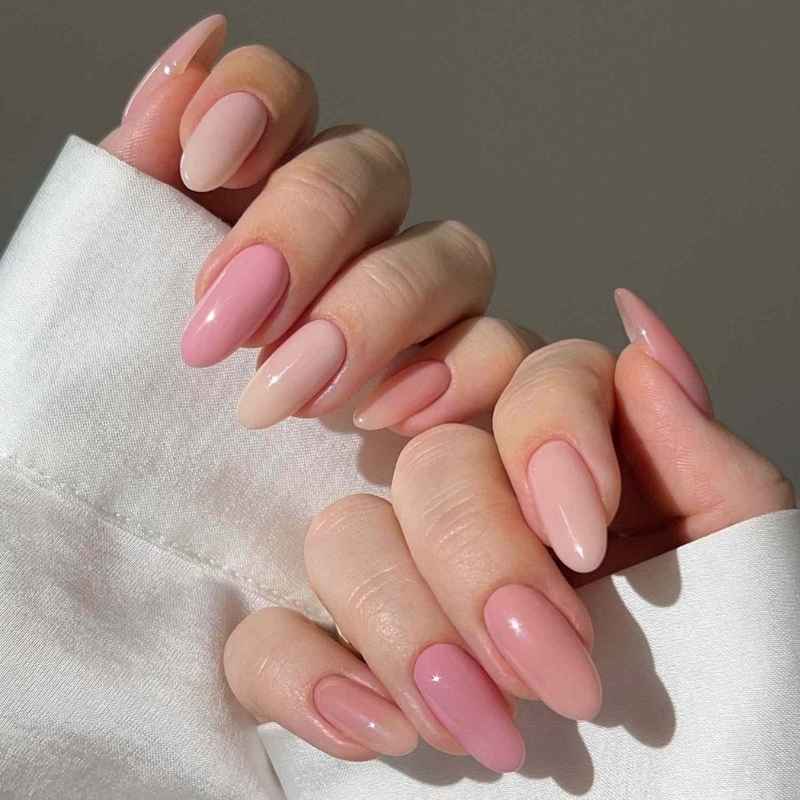
All the Shades! Light Pink Nails
Why settle for one shade of pink when you can wear all of them? I love creating an ombré effect—starting with a darker pinky and fading to a lighter tone. It gives my nails instant drama while still feeling pretty.
The result is always eye-catching and fun, with shades that feel like they’re calling your name. This look is easy, low-effort, and gets compliments every time.
🌸 How to Achieve Dark to Light Pink Gradient Nails
- Prep Your Nails: Start with clean, shaped nails. Push back your cuticles gently.
- Apply Base Coat: Use a clear base coat to protect your natural nails.
- Create Gradient: Use a makeup sponge. Paint a stripe of darker pink at the base and lighter pink above it. Dab this on your nail for a smooth gradient.
- Repeat for Intensity: Reapply the gradient 2-3 times for a stronger effect.
- Smooth with Top Coat: Seal with a glossy top coat for a seamless blend and high shine.
💡 Pro Tip: For a flawless gradient, slightly overlap the two pink shades on the sponge for a perfect blend.
Read Also: Looking for Cute Pink Nails? Here Are 2025’s Hottest Styles!
Light Pink Glitter Nail Art
When it comes to light pink nail art designs, nothing beats the perfect gloss. A shiny finish on cute light pink nail designs gives your nails a polished, ultra-manicured look.
To make sure your nails look their best, don’t forget to push back your cuticles—it’s the trick to achieving that fresh look. A soft pink with a glossy finish is timeless and effortless.
How to Achieve This Look
Get a perfect gloss on your light pink nails with this simple method:
- Prep Your Nails: Start with clean, shaped nails. Gently push back cuticles for a neat look.
- Apply Base Coat: This protects your natural nails and makes the polish last longer.
- Choose Light Pink Polish: Apply two thin coats for a smooth finish.
- Add Glitter: Use a fine glitter polish or loose glitter for a sparkly effect. Apply it to the tips or across the entire nail.
- Seal with Top Coat: Use a glossy top coat for a high-shine finish.
Pro Tip: For a smooth, salon-quality look, use a gel top coat and cure under a UV lamp.
Read Also: Looking for Cute Pink Nails? Here Are 2025’s Hottest Styles!

Adding Some Gold
If you want to make your nail art designs light pink extra special, try adding a hint of gold. Metallic accents and decals bring a fun pop that’s both elegant and bold.
This combo is perfect for when you want a little more drama without going overboard. The result? A stunning contrast between soft pink and rich gold.
How to Achieve This Look
- Prepare Your Nails: Start with clean, shaped nails. Push back cuticles for a neat base.
- Apply Base Coat: Use a clear base coat to protect your nails.
- Paint with Light Pink Polish: Add two thin coats of light pink polish. Let each coat dry.
- Add Gold Accents: Use gold foil, metallic nail tape, or gold decals. Place them on the nail tips, edges, or create delicate patterns.
- Seal with Top Coat: Use a glossy top coat to protect your design and add shine.
Pro Tip: For a luxury look, try using gold leaf or metallic gold polish.
Dreamy Touch
For a more whimsical vibe, light pink nail designs are your go-to. Think of them as your nails’ version of a soft sunset or a delicate cloud. The dreamy pink hues give off an ethereal feel that’s perfect for anyone who loves a subtle, romantic touch.
How to Achieve This Look
- Prep Your Nails: Clean, shape, and gently buff your nails. Push back cuticles for a smooth base.
- Choose Your Light Pink Shade: Opt for a soft, pastel pink polish to capture that dreamy vibe.
- Apply a Sheer Base Coat: This ensures your polish goes on smoothly and lasts longer.
- Layer with Pink Polish: Add two thin coats of your light pink shade. Let each layer dry for an even finish.
- Create a Dreamy Effect: Use a sponge to dab a touch of shimmer or pearl polish on the tips for a cloud-like, soft gradient.
- Seal with Top Coat: Apply a glossy top coat for a smooth, long-lasting shine.
Pro Tip: For an extra dreamy look, consider adding tiny silver or iridescent star stickers.
Read also: 25 Stunning Dreamy Mauve Nail Ideas You Must Try
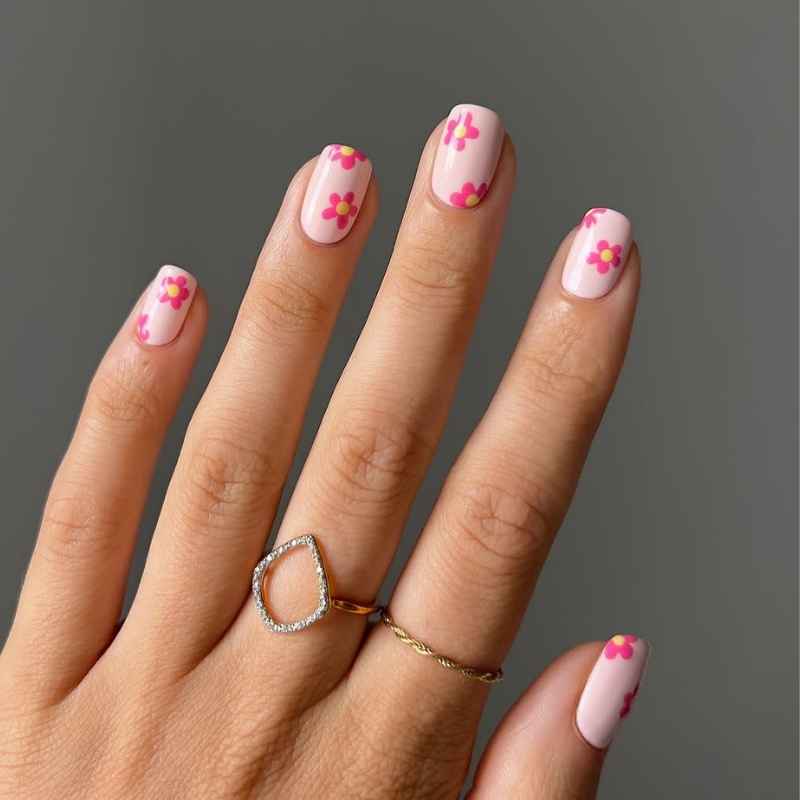
Free and Floral
There’s something timeless about two little pink flowers on a light nail. Every spring, I say “yes please” to this cute, simple design—it’s my favorite for spring nails. If you’re into light pink nails with flower design, this look nails it—literally.
It brings a floral vibe without overdoing it, like sunshine for your hands. I even included it in my spring nails guide because it’s that effortless charm everyone loves.
How to Achieve This Look
- Prep Your Nails: Start with clean, shaped nails. Push back your cuticles gently.
- Apply Base Coat: Use a clear base coat to protect your nails and help the polish last longer.
- Choose Light Pink Polish: Apply two thin coats of a soft, pastel pink shade. Let each coat dry properly.
- Add Floral Details: Use a dotting tool or a thin nail brush to draw two small pink flowers on one or two nails. A simple five-dot flower with a yellow center works best.
- Enhance with Leaves (Optional): Use a tiny brush and green polish to add leaves around the flowers for a fresh look.
- Seal with Top Coat: Finish with a glossy top coat to lock in your floral design and give it a smooth finish.
Pro Tip: If freehand isn’t your thing, use floral nail stickers for a neat, quick design.
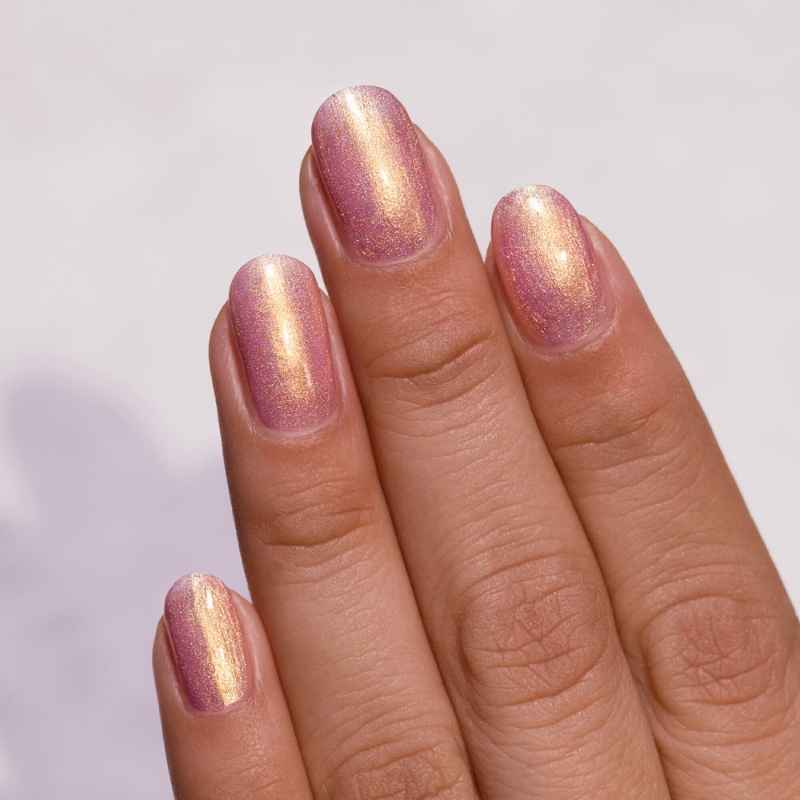
Blush Holographic
Let’s talk glow—holographic nails are always stunning, but pink makes them next-level. It’s the crème de la crème of glam. If you’re channeling Barbie for the day, this is your best bet. They’re bold, soft, and light-catching—and yes, I DIY mine and still get compliments!
How to Achieve This Look
- Prep Your Nails: Start with clean, filed nails. Push back cuticles for a neat base.
- Apply Base Coat: A clear base coat protects your nails and makes the polish last longer.
- Choose a Blush Pink Base: Pick a soft pink or blush polish. Apply two thin coats, letting each dry completely.
- Add Holographic Shine: Use a holographic powder or a holographic top coat for that light-catching effect. If using powder, gently rub it on with a sponge applicator.
- Seal with Top Coat: Apply a glossy, no-wipe top coat for a mirror-like finish. This step also keeps your holographic shine intact.
Pro Tip: If you want a super-reflective look, use a silver holographic base under your blush pink for a stunning blend of colors.
Y2K Style Icon
2000s fashion is back—from our shoes to our fingertips. This nail design feels like a Lizzie McGuire decal, and that makes it even better. It’s a fun mix of retro, girly, and Y2K. I wear it when I want to live my best early-2000s dream.
How to Achieve This Look
- Prep Your Nails: Start with clean, shaped nails. Push back cuticles and buff the surface for a smooth base.
- Choose a Retro Base Color: Opt for classic Y2K shades like baby pink, lilac, or sky blue. Apply two coats for an even finish.
- Add Y2K Decals: Use fun stickers like butterflies, stars, smiley faces, or hearts—iconic designs from the 2000s. Arrange them in a playful, scattered pattern.
- Seal with Glossy Top Coat: Use a high-shine top coat to lock in the decals and give your nails that glossy, polished look.
Pro Tip: For a true Y2K vibe, try using metallic outlines around the decals or adding a touch of glitter to keep it fun and nostalgic.
Metallic Magic
Sometimes, a metallic set of nails is enough to make a statement. But other times, adding a tiny bow detail is the perfect addition to set this design apart from the rest.
Whether you’re going for a simple yet chic look or need a hint of glam, metallic nails with a cute bow make all the difference. They offer the perfect balance of minimal glam and shine, making them the ideal choice for a sleek yet striking manicure.
How to Achieve This Look
- Start with Nail Prep: Clean, file, and shape your nails. Push back cuticles for a neat base.
- Apply Metallic Base Color: Choose a bold metallic shade—silver, gold, or rose gold are perfect. Apply two coats for full coverage and a smooth, reflective finish.
- Add the Bow Detail: Use a tiny bow decal or 3D nail charm. Place it on an accent nail (like your ring finger) for a chic look. Adjust the placement using a dotting tool or tweezers.
- Seal with Top Coat: Use a clear, high-shine top coat to protect the metallic finish and keep the bow securely in place.
Pro Tip: For a more sophisticated look, you can also use a matte top coat on a few nails while keeping the metallic nails glossy.

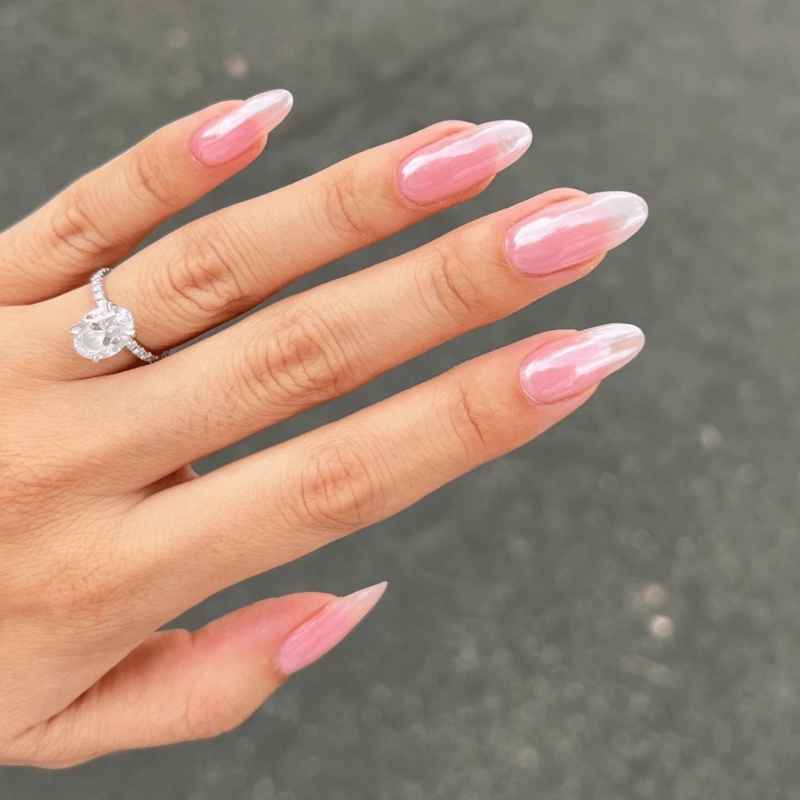
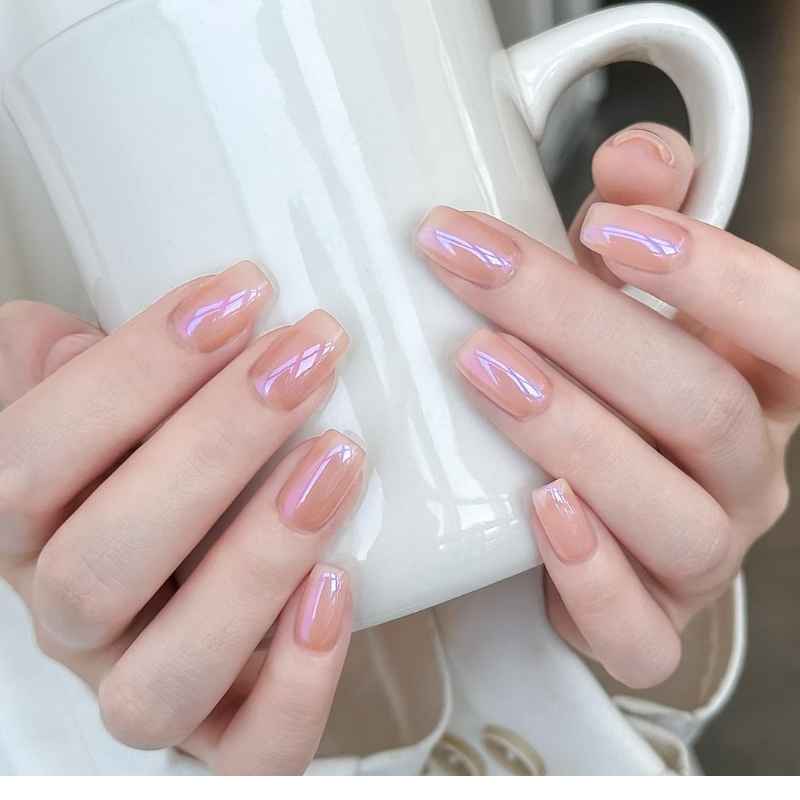
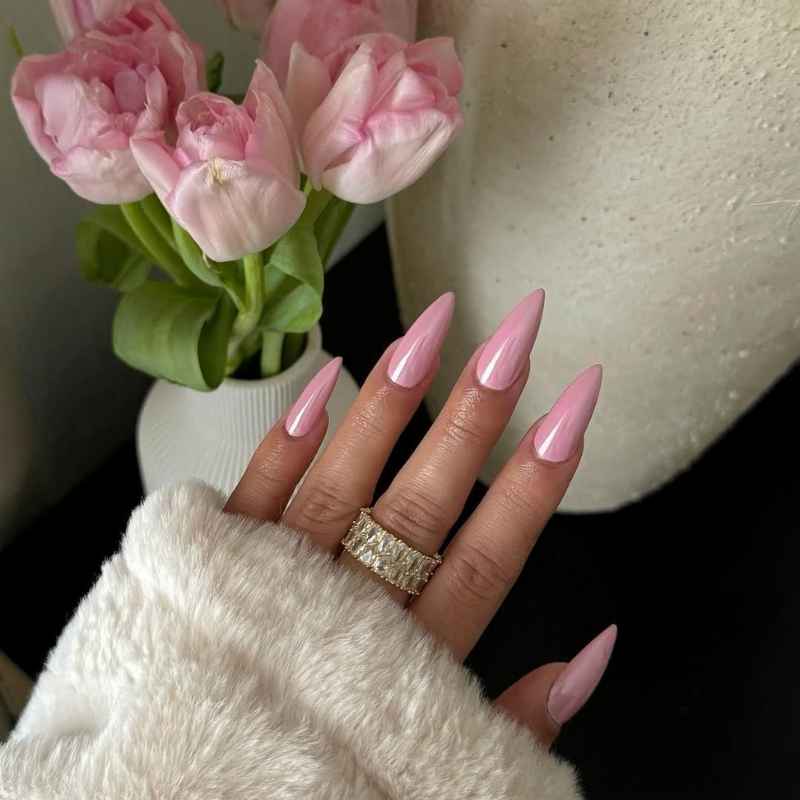
Shimmer in Pink
If you’re all about a subtle, glowing look, you’ll love this shimmery pink design. The translucent shade paired with a long, almond nails set really enhances the overall feel, as the see-through polish catches the light beautifully.
It’s perfect for those who enjoy a shimmering finish without being too bold. This style effortlessly blends elegance with a soft, ethereal glow.
How to Achieve This Look
- Nail Prep Matters: Start by cleaning your nails, shaping them into a long almond style, and gently pushing back the cuticles. This gives your nails a neat base for a perfect finish.
- Choose the Right Shade: Pick a translucent pink polish with a subtle shimmer. Apply a thin first coat for a light, glowing effect. Add a second coat for a more noticeable shine.
- Enhance the Glow: For an extra shimmer, use a fine glitter top coat over the pink polish. This adds depth without overpowering the delicate look.
- Seal with a Glossy Top Coat: Finish with a high-shine top coat to lock in the shimmer and keep your nails looking fresh and radiant.
Pro Tip: If you want a more dimensional look, use a shimmer powder over the pink polish before applying the top coat. This gives a soft, ethereal glow that catches the light beautifully.

Strawberry Milk
Yes, a cow print looks perfect with a light pink background—any questions? This fun, playful design is perfect for those who like to add a bit of quirky charm to their nails.
The light pink base perfectly contrasts with the bold cow spots, giving it an unexpectedly stylish twist.
How to Achieve This Look
- Prep Your Nails: Start by cleaning your nails, shaping them, and gently pushing back the cuticles. A smooth base is key for this playful design.
- Apply the Light Pink Base: Choose a soft, milky pink shade and apply two even coats. Let each coat dry properly for a smooth finish.
- Create the Cow Print: Use a thin nail art brush or a dotting tool with black polish. Randomly place irregular, rounded spots on each nail. The spots should be playful but not overcrowded.
- Seal with a Top Coat: Use a glossy top coat to protect the design and give your nails a sleek, shiny finish.
Pro Tip: For a fun twist, use a pink or white cow print instead of black, giving your nails a softer, more pastel look.
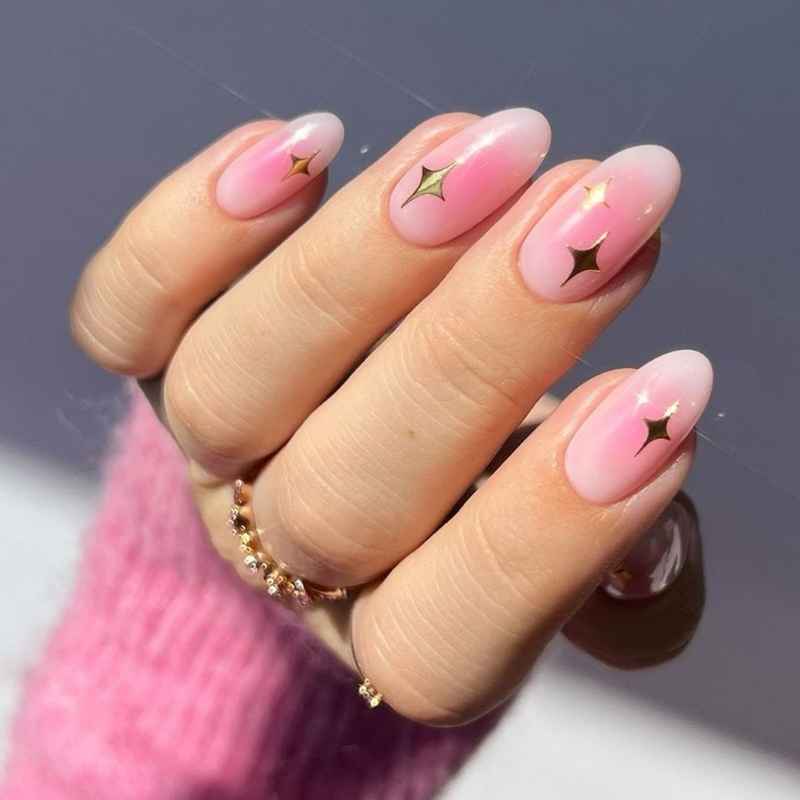
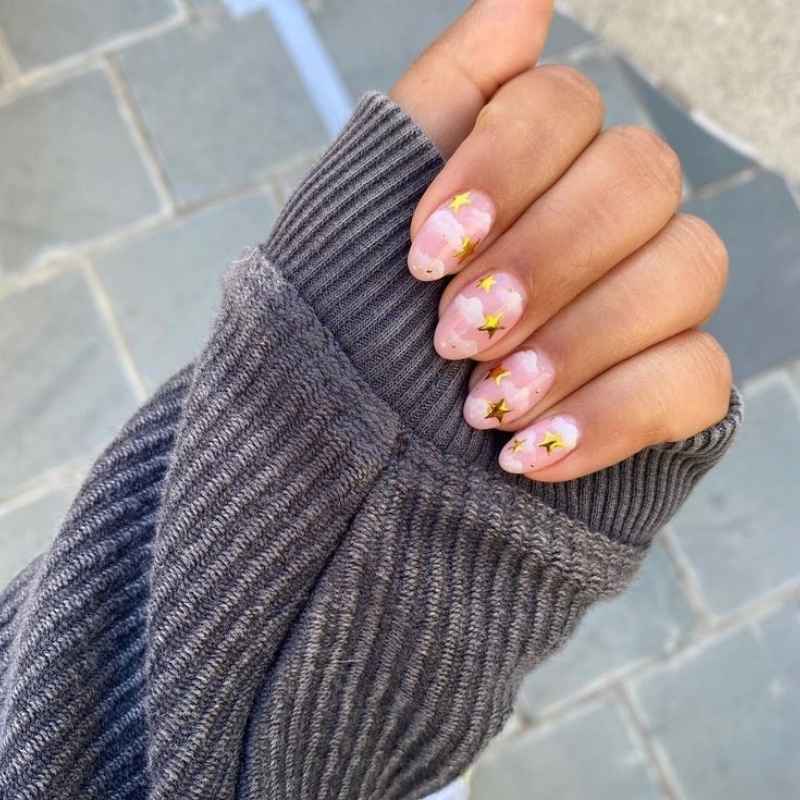
Aura Stars
For a dreamy, ethereal vibe, this stunning manicure features a pale, pinky nude base with a pink aura at the center, topped with golden stars. It’s a fun and whimsical design that feels both delicate and striking.
If you’re looking to add a little magic to your nails, the combination of the soft nude and starry accents gives off that perfect celestial feel.
How to Achieve This Look
- Prepare Your Nails: Start with clean, shaped nails. Gently push back your cuticles and buff the nail surface for a smooth base.
- Apply the Base Color: Use a pale pinky nude polish as your base. Apply two coats, letting each dry completely. This gives your nails that soft, dreamy look.
- Create the Aura Effect: Use a light pink polish to create a soft, glowing aura in the center of each nail. You can do this with a small makeup sponge or a fine nail art brush for better control.
- Add Golden Stars: Use tiny gold star stickers, decals, or hand-paint them with a fine brush and gold polish. Place them around the aura for that magical, celestial look.
- Seal It All In: Finish with a clear, glossy top coat to protect your design and give it a long-lasting shine.
Pro Tip: For an even more magical touch, use a shimmer top coat to give your nails a soft, iridescent glow.
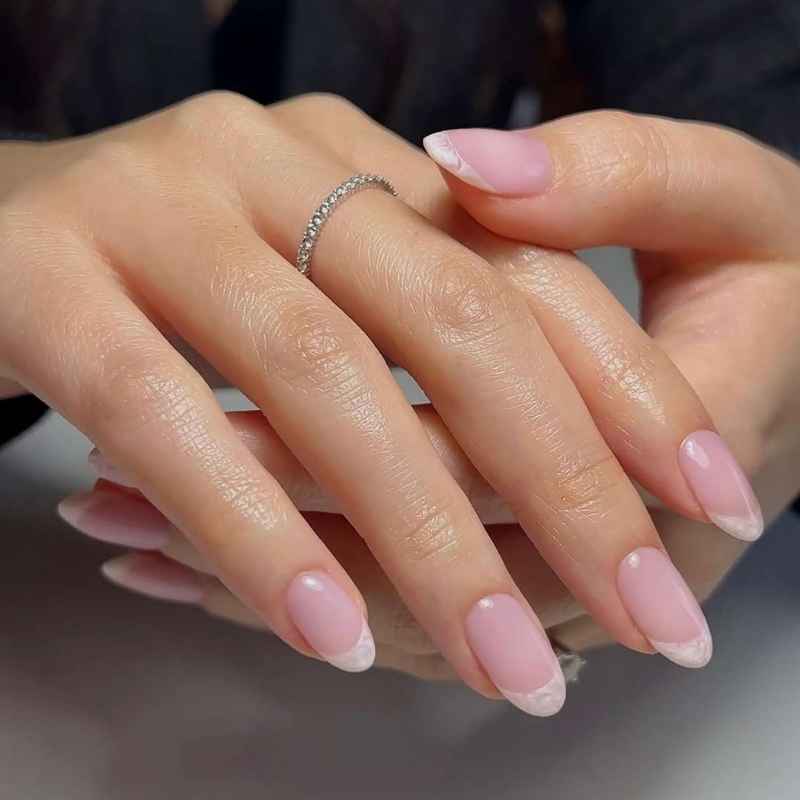
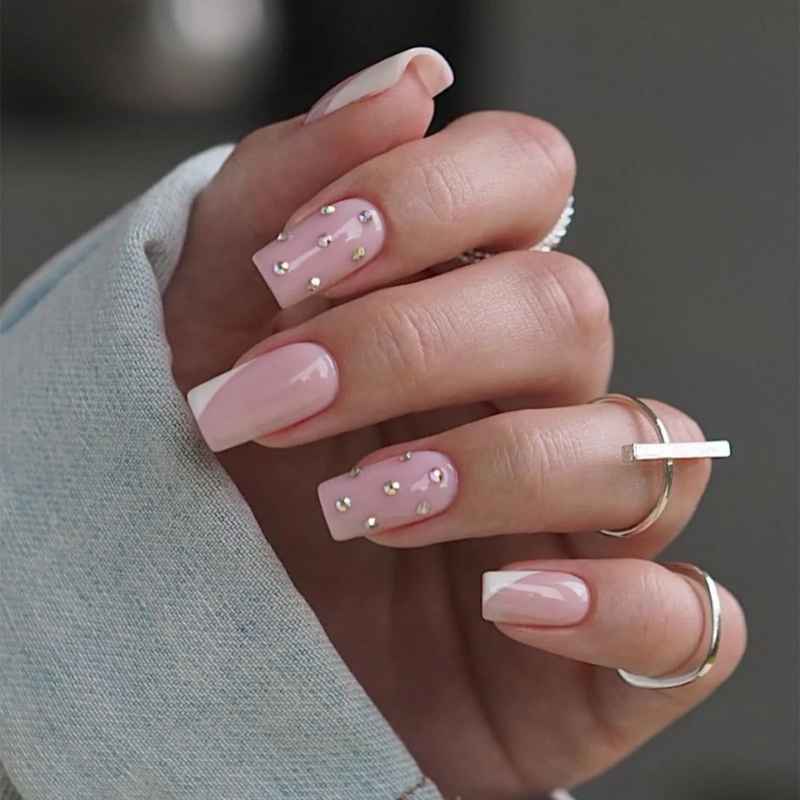
Perfect with Pearls
A soft, vanilla pink nail set paired with pearls is simply elegant. It’s a timeless combination that feels fresh and sophisticated at the same time. If you’re into understated beauty, this design adds just the right amount of class.
The pearls elevate the look without overpowering it—making it perfect for any occasion where you want a touch of chic sophistication.
How to Achieve This Look
- Prep Your Nails: Start with clean, filed nails. Gently push back your cuticles and buff the surface for a smooth finish. This ensures your polish lasts longer.
- Apply the Base Color: Choose a soft, vanilla pink polish for a classic, elegant look. Apply two thin coats, allowing each to dry for a smooth, even finish.
- Place the Pearls: Use tiny adhesive pearl decals for an effortless application. If you prefer a secure hold, use a dot of clear nail glue. Arrange them along the base, center, or tips of your nails for a chic look.
- Seal with a Top Coat: Apply a clear, glossy top coat to lock in the pearls and add shine. This also prevents the pearls from falling off.
Pro Tip: If you want a more luxurious look, mix small and medium-sized pearls for a textured, 3D effect.
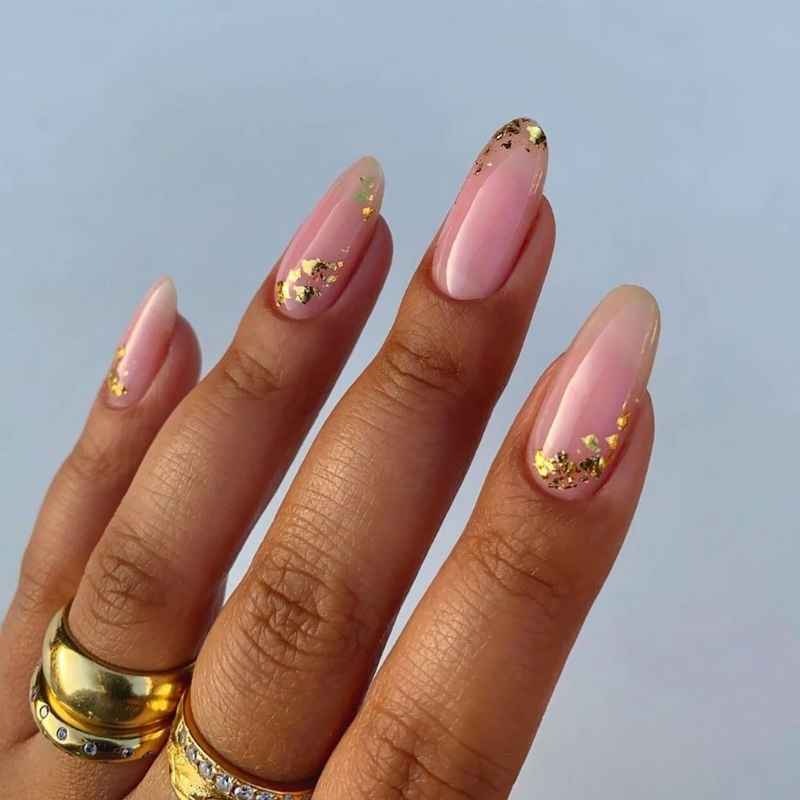
Glazed and Golden
Looking for something shiny and bold? Try a glazed pink finish with a golden decal. The result is a super chic, modern look that catches the light in all the right ways.
The golden decal is the perfect bow on top, adding a little bit of glam to your nails. It’s the type of style that makes a statement while staying effortlessly polished.
How to Achieve This Look
- Prep Your Nails: Start with clean, shaped nails. Push back cuticles and buff the nail surface for a smooth application. This gives your design a flawless base.
- Apply the Base Color: Choose a soft, glazed pink polish for that stunning, reflective finish. Apply two coats, letting each dry properly. For a super glossy look, use a chrome powder on top of the polish for that glass-like effect.
- Add the Golden Decal: Pick a golden decal of your choice (like a tiny bow or a geometric design). Use tweezers for precise placement. Press gently to secure it in place.
- Seal with a Top Coat: Use a high-shine, clear top coat to lock in the decal and enhance the glossy effect of the pink base.
Pro Tip: If you want an ultra-glazed look, use a gel top coat and cure it under a UV lamp. This keeps your nails looking fresh and glossy for days.

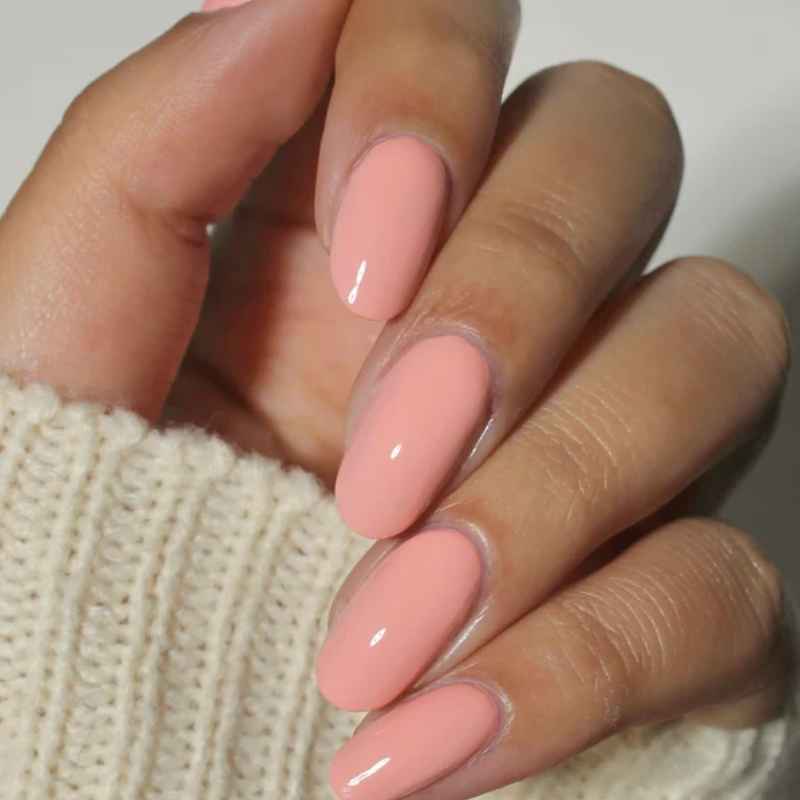
Just Peachy
Sometimes, all you need is a little hint of peach. This color is soft, pretty, and doesn’t need any extra sparkles or gadgets to make an impact.
The peach tones bring warmth and charm to your nails, making it a perfect pick for anyone who loves a naturally beautiful, standout look without being too loud.
How to Achieve This Look
- Prepare Your Nails: Start with clean, shaped nails. Push back your cuticles and gently buff the surface for a smooth finish. This ensures your polish stays on longer.
- Choose Your Perfect Peach Shade: Pick a soft, peach nail polish. Apply a thin base coat to protect your nails, then follow with two coats of the peach polish. Make sure each coat is fully dry before applying the next.
- Perfect the Finish: For an ultra-smooth, glossy look, seal with a clear top coat. If you prefer a matte finish, use a matte top coat instead. This keeps your nails looking fresh and chic.
Pro Tip: If you want a subtle twist, you can add a delicate peach shimmer on one accent nail for a touch of elegance without overpowering the look.
Pink Claws
Long, sharp nails can be intimidating, but when you add a sweet cotton candy pink, they’re softened and become absolutely stunning.
This design is all about striking a balance between fierce and fun. If you’re into bold nails but still want to keep it playful, pink claws with this pastel hue are a must-try. They’re edgy, sweet, and the perfect way to show off your style.
How to Achieve This Look
- Prep Your Nails: Start with clean, dry nails. If you’re using nail extensions for the claw shape, make sure they are securely applied. Shape them to your desired sharp, pointed look.
- Choose Your Pink Shade: Opt for a soft cotton candy pink polish for that perfect mix of sweet and fierce. Apply a thin base coat first, followed by two coats of the pink polish. Let each layer dry for a smooth, even finish.
- Seal and Shine: Finish with a high-gloss top coat for a sleek look. If you want a twist, you can add a touch of shimmer or tiny silver decals on one or two nails for extra flair.
Pro Tip: Keep a nail file handy to maintain the sharp, claw-like shape. This ensures your bold, edgy look stays flawless.
Read Also: 33 Pink & Orange Nail Designs You Need to Try in 2025!
Candy Cloud Dreams
For the person who always needs a sweet treat, these cotton candy nails are the perfect choice. They blend fun and style without going overboard. Plus, they look cute enough to eat, but let’s not!
How to Achieve This Look
- Start with a Clean Base: Begin with freshly cleaned nails and apply a base coat to protect them. This will also help your polish last longer and prevent staining.
- Choose Soft, Pastel Colors: Opt for pastel pink, blue, or lavender shades. These soft hues mimic the light, airy feel of cotton candy. Apply your chosen colors in alternating layers for a dreamy, blended effect.
- Create the Cotton Candy Effect: Use a sponge or makeup wedge to gently blend the pastel shades on each nail. Dab the sponge to create a soft, gradient look that resembles fluffy cotton candy clouds.
- Top It Off with Shine: Seal the look with a glossy top coat to make your candy clouds shine. For added sweetness, you can add small glitter particles or a touch of shimmer for an extra pop of sparkle.
Pro Tip: To enhance the cotton candy feel, keep the design soft and subtle with minimal details. The goal is to achieve a gentle, whimsical vibe.
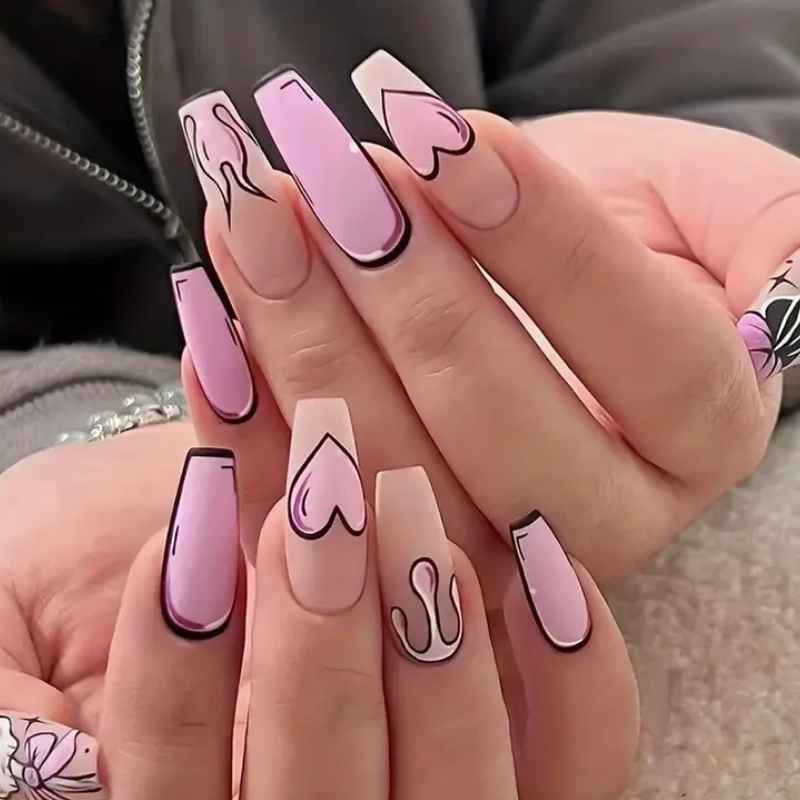
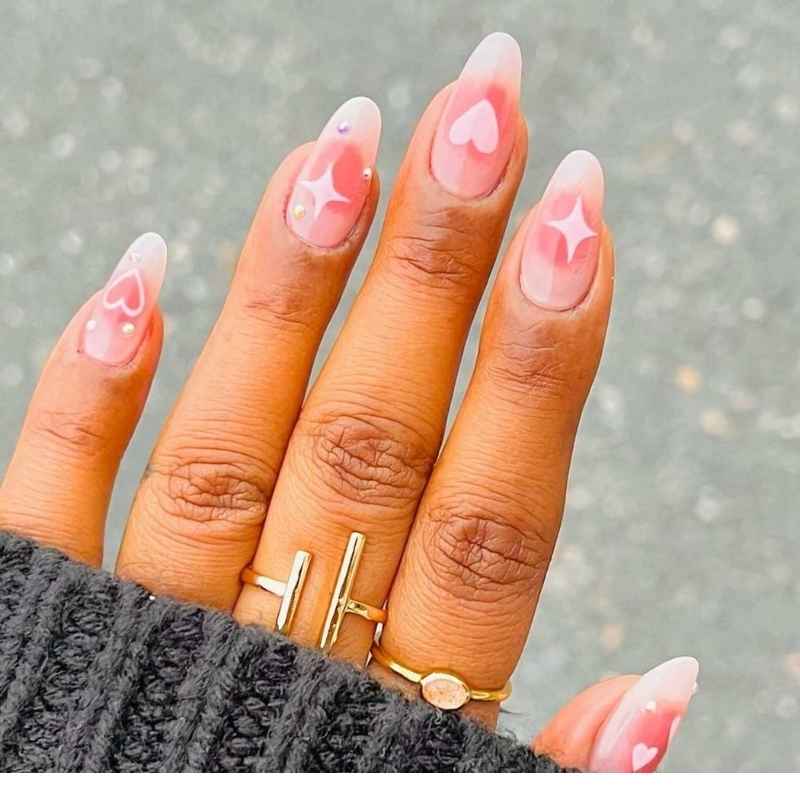
Heartfelt Aura
This charming design really features a darker shade in the center that slowly fades into baby hues near the ends. Add a tiny, hand-drawn heart, and you’ve got a soft and cute look that’s romantic and wearable every day.
How to Achieve This Look
- Prep Your Nails: Start by cleaning and trimming your nails to your desired length. Apply a base coat to protect your natural nails and ensure the design lasts longer.
- Choose Your Shades: Select a darker color for the center, like deep pink or burgundy, and a lighter shade, such as pastel pink or baby blue, for the tips. The combination should create a soft gradient effect.
- Create the Gradient Effect: Using a makeup sponge or a gradient tool, apply the darker shade at the base of your nails. Gradually blend it out toward the tips with the lighter color, making sure the transition is smooth and seamless.
- Add the Heart Detail: Once the gradient is dry, use a fine nail brush or a dotting tool to carefully draw a small heart in the center or towards the tips of each nail. A white or contrasting color will make the heart stand out beautifully.
- Finish with a Glossy Top Coat: Seal the design with a glossy top coat for a shiny, professional finish. This will protect your art and give it a sleek, polished look.
Pro Tip: Keep the heart simple and small to maintain the delicate and romantic feel. This design is great for both casual and special occasions!
Light Pink Almond Nail Designs
Light pink almond nails with design are the perfect mix of soft elegance and modern style. The almond shape flatters all hands, while the light pink color keeps things clean, classy, and wearable for any occasion.
Whether you go for simple styles or detailed art, light pink almond nail designs give you endless options—from gentle pastels to bold accents. It’s a timeless look that always feels fresh and chic.
How to Achieve This Look
- Prep Your Nails: Trim and file your nails into an almond shape for a flattering, elegant look.
- Base Coat: Apply a base coat to protect your nails and create a smooth foundation.
- Apply Light Pink Polish: Choose a light pink shade and apply two coats for a clean, even finish.
- Add Design (Optional): For extra flair, add simple nail art like gold lines, dots, or florals.
- Top Coat: Seal with a glossy top coat for a shiny, long-lasting finish.
Short Pink Nails
If you’re after a pretty pink manicure that’s functional and dexterity-friendly, short light pink nails are your best bet. No need to sacrifice dexterity or go slow with typing—these minimalist pink nails make it easy to stay chic without effort.
Add a design to your short light pink nails for a touch of flair, while keeping the look low-maintenance and cute. Perfect for anyone looking for practical pink nails that still stand out.
How to Achieve This Look
- Trim & Shape: Keep your nails short and square or round for a neat, low-maintenance look.
- Base Coat: Start with a base coat to protect your nails and ensure a smooth surface.
- Apply Light Pink Polish: Choose a light pink shade and apply one or two coats for a clean finish.
- Add Simple Design (Optional): To enhance the look, you can add small designs like subtle dots, stripes, or a small heart.
- Top Coat: Finish with a glossy top coat to give your nails a beautiful shine and ensure longevity.
💡 Pro Tip: For a flawless look, use a quick-dry top coat to keep your short pink nails shiny and chip-free.

No matter your vibe, light pink nail designs always deliver that polished, effortlessly chic look. From soft florals to bold gold accents, there’s a style for every mood and moment.
💅 Found your fave? Save it, pin it, or bring it to your next nail appointment. And if you recreate one, tag us—we’d love to see your pink power moment shine! ✨


One Comment