
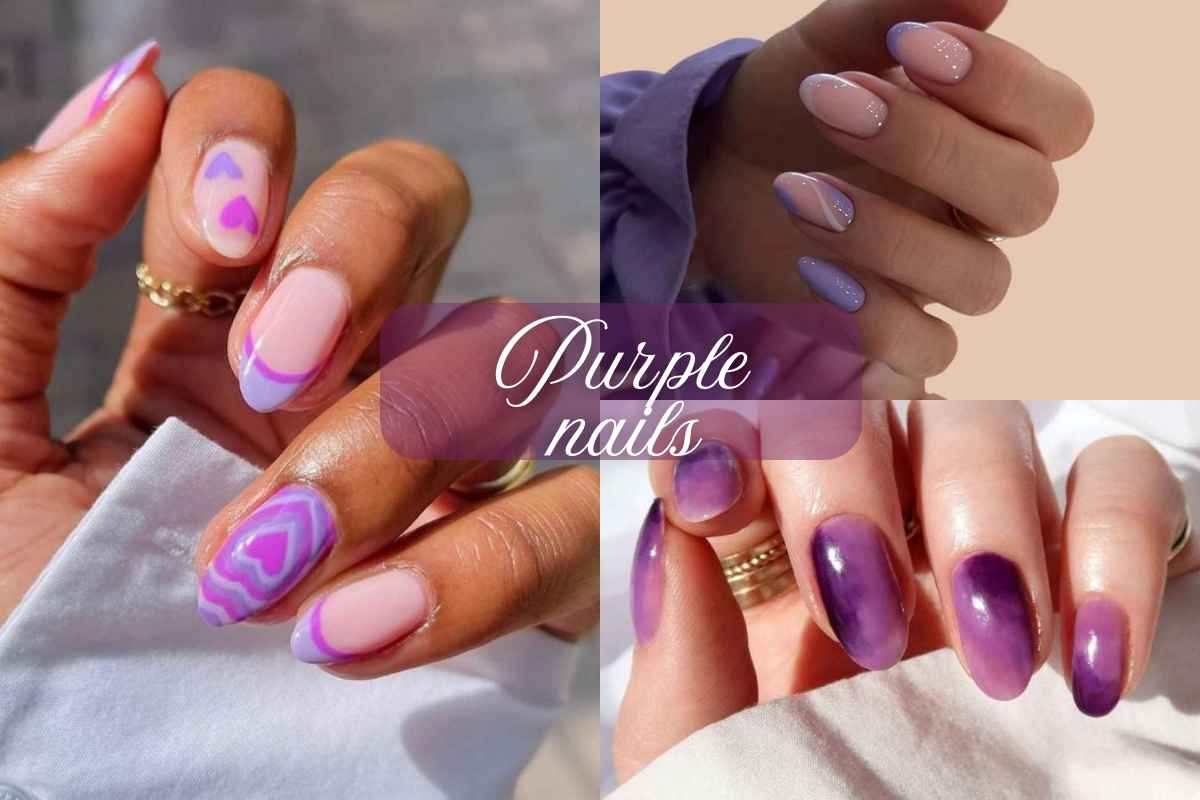
There’s something truly magical about purple nails—they instantly add a touch of royalty, creativity, and individuality to your look. Whether you love lighter shades for a soft, chic transition into fall or prefer the deep richness of plum and mauve, there’s a style for everyone! If you’re searching for a nail design that feels elegant, bold, and effortlessly trendy, then you have to try a regal ombre.
Imagine the luxurious blend of lavender and deep plum seamlessly melting into each other—polished, glossy, and absolutely stunning.
Whether you go for a glossy topcoat for a high-shine finish or keep it matte for an understated edge, your nails will be turning heads everywhere! Keep reading if you’re ready to elevate your nail game with this stunning look!
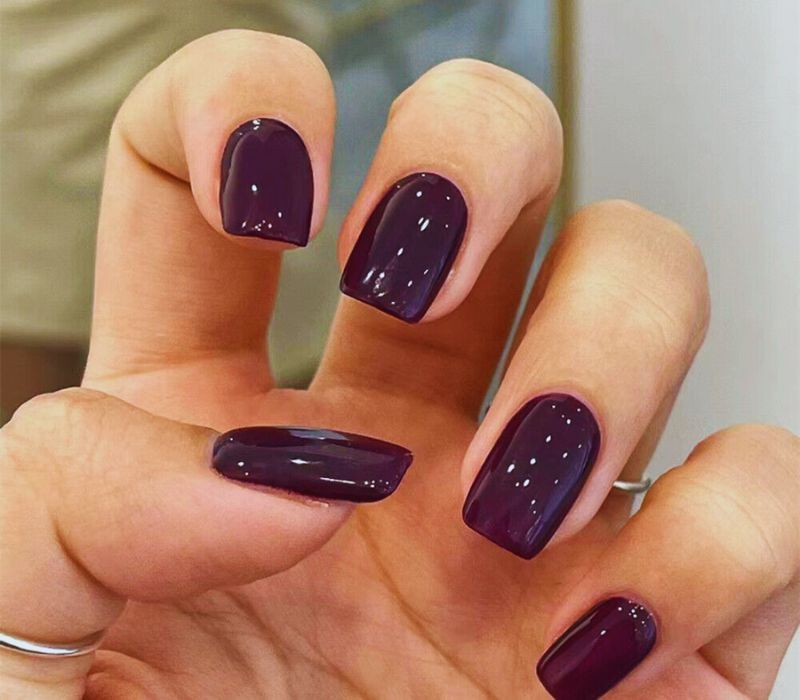
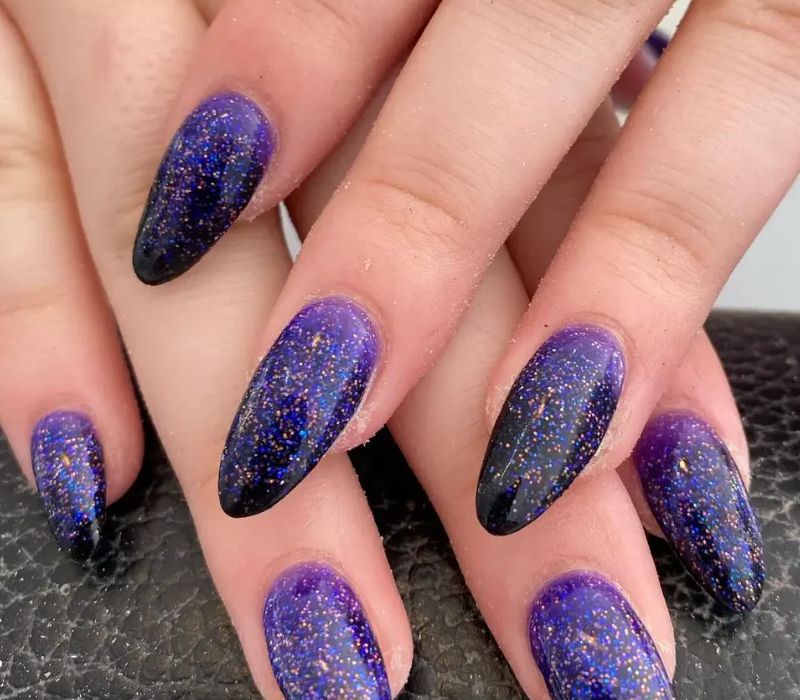
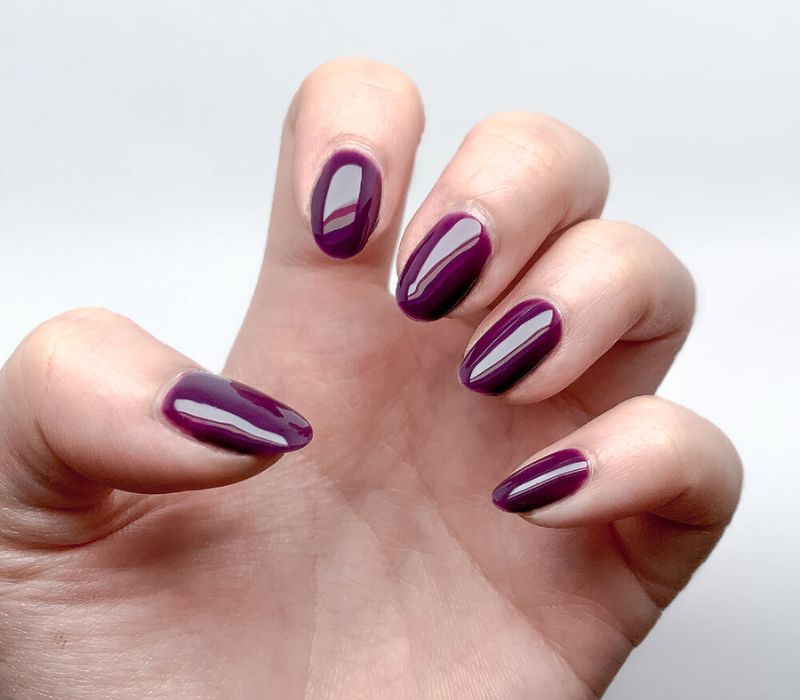
Dark Purple
Imagine your nails glowing like the fall night sky, deep and mysterious with a touch of glitter accent. A dark purple manicure isn’t just bold—it’s a statement of luxury and confidence. Whether you love a subtle shine or a fully glossy finish, this look is effortlessly elegant without feeling overdone.
How to Achieve Dark Purple Nails
1️⃣ Prep Your Nails: Shape and buff your nails to your desired style. Almond or square shapes work best for this dramatic look.
2️⃣ Apply Base Coat: Start with a clear base coat to protect your nails and enhance polish adhesion.
3️⃣ Deep Purple Polish: Use a dark purple nail polish, applying two thin coats for an even, rich color.
4️⃣ Optional Glitter Accent: For a glamorous twist, add a touch of purple or silver glitter on an accent nail.
5️⃣ Finish with Top Coat: Seal your look with a glossy or matte top coat for a flawless, long-lasting finish.
Quick tip: To avoid streaks with dark polish, make sure each coat is fully dry before applying the next
READ ALSO: 30 Best Black and White Nails Designs for 2025
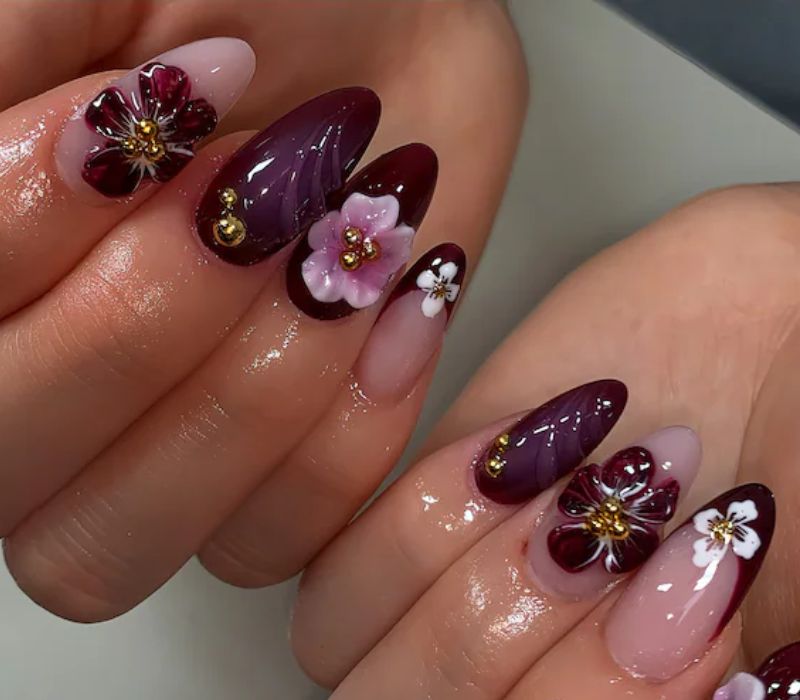
Floral Delight with a Pop of Purple
Why choose between nude nails and floral patterns when you can have both? A glossy top coat enhances the delicate tiny flowers in purple, white, and orange shades, creating a fresh yet stylish look. Perfect for any season, this manicure brings a natural charm to your fingertips while keeping things fun and artistic.
How to Achieve Floral Delight Nails
1️⃣ Prep Your Nails: Shape and buff your nails for a smooth surface. A rounded or almond shape enhances the floral look.
2️⃣ Apply Base Coat: Start with a clear base coat to protect your nails and ensure the design lasts longer.
3️⃣ Nude Base Color: Apply a neutral or nude polish as your base. Allow it to dry completely.
4️⃣ Add Floral Art: Using a fine nail brush or dotting tool, carefully create tiny flowers in purple, white, and orange. For a balanced look, focus on one or two accent nails.
5️⃣ Seal with Top Coat: Finish with a glossy top coat to make the flowers pop and keep your nails looking fresh.
Quick tip: For precise flowers, practice on a plastic sheet first—it’s a game changer for steady designs.
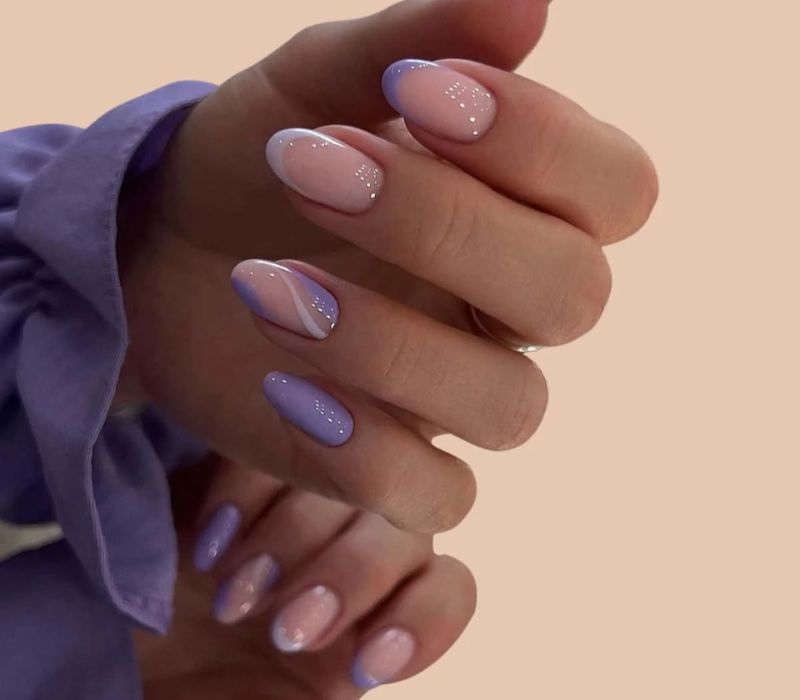
Lavender Dreams
If you love soft, dreamy nails, then lavender is calling your name! A pastel manicure with creamy polish, shimmering glitter, and delicate floral accents gives your nails an ethereal glow. Whether for a springtime refresh or a special occasion, this look lets you channel your inner goddess most stunningly.
How to Achieve Lavender Dreams Nails
1️⃣ Prep Your Nails: Shape and file your nails to your desired length. Almond or oval shapes complement this dreamy style best.
2️⃣ Apply Base Coat: Protect your nails with a clear base coat to ensure smooth application.
3️⃣ Lavender Base Color: Apply a creamy lavender polish as your main shade. Two coats should give a rich, pastel finish.
4️⃣ Add Glitter Accents: Use a fine glitter polish on one or two accent nails for a subtle sparkle. You can also add a touch of glitter near the cuticles for a gradient effect.
5️⃣ Floral Details: For an extra magical touch, use a fine brush to paint tiny white flowers or use nail stickers for an easy fix.
6️⃣ Finish with Top Coat: Seal everything with a glossy top coat for a luminous, long-lasting finish.
Quick tip: Keep a toothpick handy for precise floral details—it’s a simple way to achieve clean, delicate designs.
Abstract Plum
Looking for a fun, artistic twist to your mani? Try an abstract plum design featuring swirly patterns and negative space for a chic nail art look. This stylish trend is perfect for those who love creativity, bringing a mix of boldness and elegance to your fingertips.
How to Achieve Abstract Plum Nails
1️⃣ Nail Prep: Start by shaping your nails to your preferred style—almond or square works best for this look.
2️⃣ Apply Base Coat: Use a clear base coat to protect your natural nails and ensure a smooth application.
3️⃣ Base Color: Use a sheer nude or milky white polish for a clean base that enhances the negative space effect.
4️⃣ Abstract Swirls: With a fine brush or a nail art pen, create swirly patterns in a deep plum shade. Get creative with curved lines, tiny dots, and even a mix of thick and thin strokes.
5️⃣ Negative Space Details: Leave some areas of your nails clear or use a contrasting light shade to emphasize the design.
6️⃣ Top Coat for Shine: Finish with a glossy top coat to seal the design and add a beautiful shine.
Quick tip: For more control, practice your swirl designs on a plastic sheet first—it helps you perfect your pattern before going on your nails.
Purple Tonal
Can’t decide on one shade? Go for a purple nail look, where each fingertip is painted in a different shade of purple, just like a mixed berries palette. This ombre-inspired design is playful, bold, and the brighter cousin of a classic box of chocolate nails—perfect for those who love a colorful statement.
How to Achieve Purple Tonal Nails
1️⃣ Nail Prep: Shape and buff your nails to your desired style—almond and square shapes look great with this design.
2️⃣ Base Coat: Apply a clear base coat to protect your natural nails.
3️⃣ Select Your Shades: Pick five different shades of purple, ranging from the lightest lavender to the deepest plum. Make sure the tones flow naturally from one to the next.
4️⃣ Apply Colors: Paint each nail with a different shade, starting with the lightest on your pinky and gradually going darker toward your thumb.
5️⃣ Top Coat: Seal the look with a glossy top coat for a smooth, shiny finish.
Quick tip: To keep your gradient smooth, choose shades from the same brand—they blend better and offer a consistent finish.
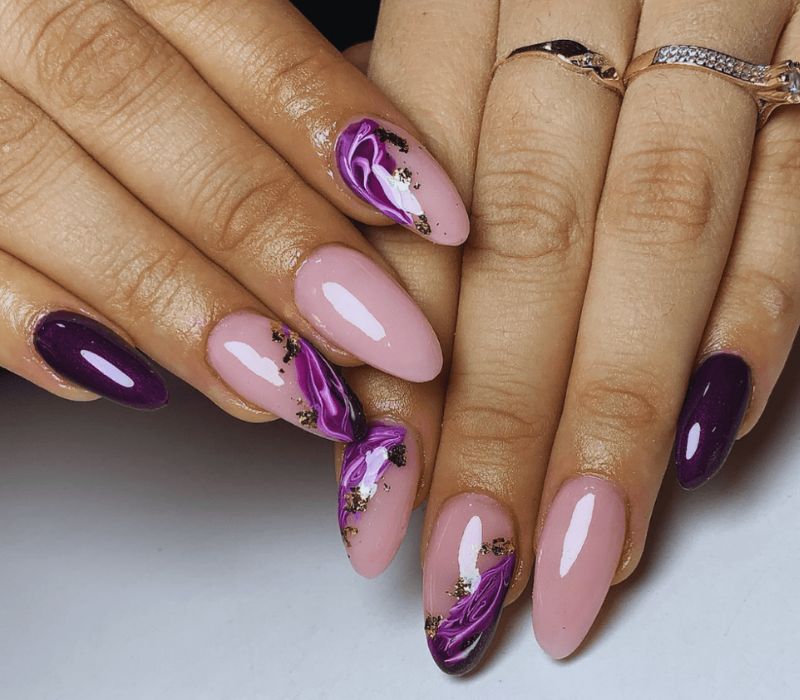
Ametrine-Inspired
If you’re drawn to crystals and gemstones, why not reflect that in your nail art? A light purple polish with gold outlining gives a touch of balance and creativity, just like the ametrine gemstone. This stunning set is both elegant and powerful, making your nails feel like a true piece of jewelry.
How to Achieve Ametrine-Inspired Nails
1️⃣ Nail Prep: File and buff your nails, then apply a base coat to protect them.
2️⃣ Base Color: Paint your nails with a soft, light purple polish—lavender or pastel purple works best.
3️⃣ Add Gold Detailing: Use a thin nail art brush dipped in metallic gold polish to create delicate outlines along the edges of your nails. You can also add tiny gold flakes for a more gemstone-like look.
4️⃣ Optional Gemstones: For an extra luxurious touch, add tiny gold or purple rhinestones near the cuticle.
5️⃣ Top Coat: Seal everything with a clear, glossy top coat to keep the design intact and shiny.
Quick tip: If freehanding the gold details feels tricky, try using gold nail stickers or a thin metallic nail tape.
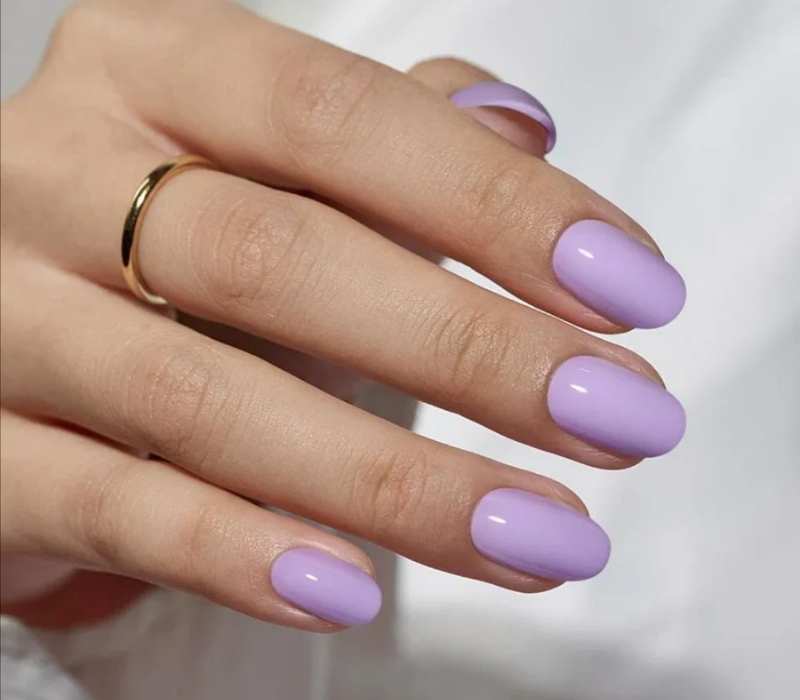
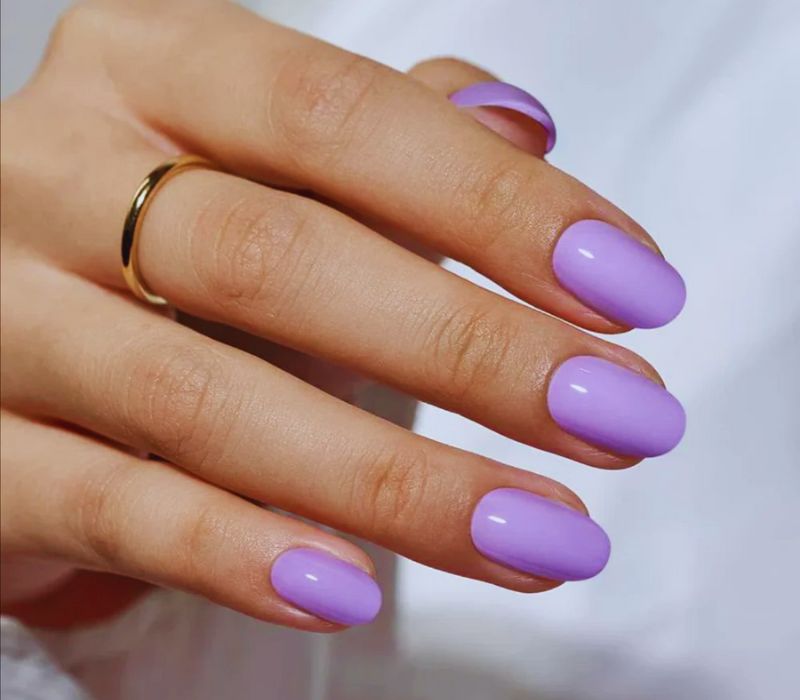
Light Purple Nails
Want a manicure that feels unique and stylish? Light purple nails bring a soft, chic touch to any look while letting your creativity shine. Whether you’re out in the sun or enjoying a cozy moment, this beautiful shade makes your hands glow effortlessly. Try it and see the magic!
How to Achieve Light Purple Nails
1️⃣ Nail Prep: Start with clean, trimmed nails. Gently buff the surface and apply a base coat to protect your natural nails.
2️⃣ Apply Light Purple Polish: Use a soft, pastel purple shade. Apply two thin coats for an even, opaque finish.
3️⃣ Add a Little Sparkle (Optional): For a magical touch, lightly dust a fine glitter polish on one or two accent nails.
4️⃣ Seal It: Finish with a glossy top coat for a radiant, shiny look, or a matte top coat for a chic, velvety finish.
Quick tip: Use a sheer purple for a more delicate, barely-there look, or choose a creamy, opaque shade for a bolder statement.
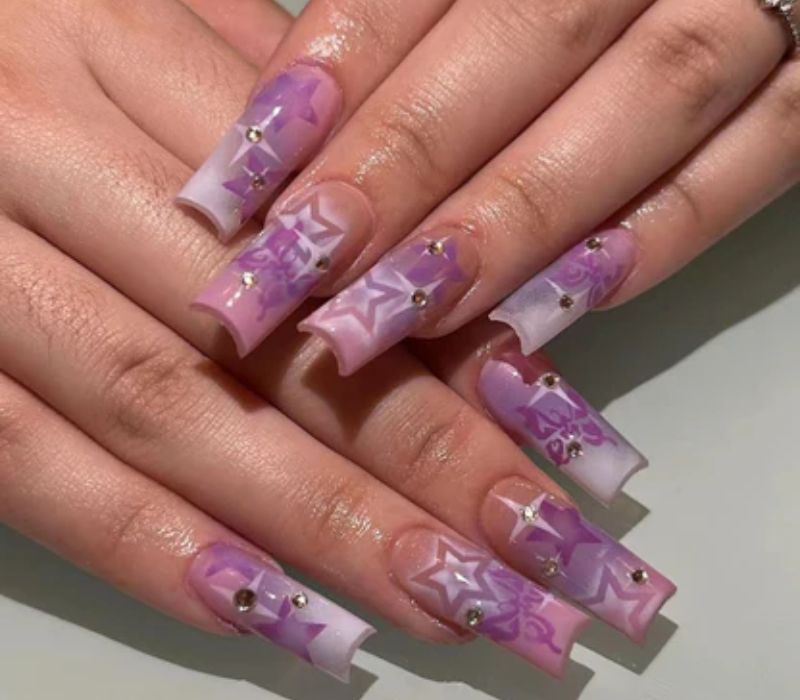
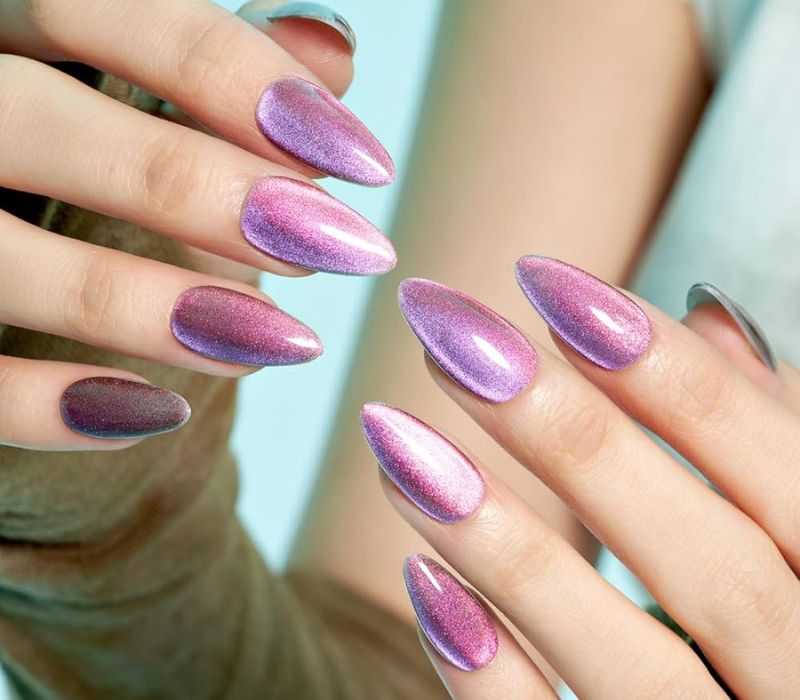
Purple Chrome Nails
Purple chrome nails are the ultimate statement! The metallic shine, paired with delicate flower and star details, creates a vibrant purple base that stands out. This chrome manicure catches the light beautifully, making every movement sparkle.
Add gem accents for extra glam, or keep it sleek with a reflective polish. Perfect for a trendy nail appointment, this look is bold, classy, and impossible to ignore!
How to Achieve This Look
1️⃣ Prep Your Nails: Start with clean, shaped nails. Apply a base coat to protect your natural nails.
2️⃣ Choose Your Base Shade: Apply a purple gel polish for a vibrant, reflective base. Cure it under a UV/LED lamp.
3️⃣ Add Chrome Powder: Use a purple chrome powder, gently buffing it over the cured polish with an applicator for that high-shine metallic finish.
4️⃣ Design Details: Use a thin brush to create flower or star accents. You can also place tiny gems for added sparkle.
5️⃣ Top Coat for Shine: Seal everything with a high-gloss, no-wipe top coat to lock in the design and boost the shine.
Quick Tip: For the best chrome effect, make sure to use a no-wipe top coat before applying the chrome powder. This gives a smoother, mirror-like finish.
READ ALSO: Fall in Love with These Stunning Burgundy Nail Ideas
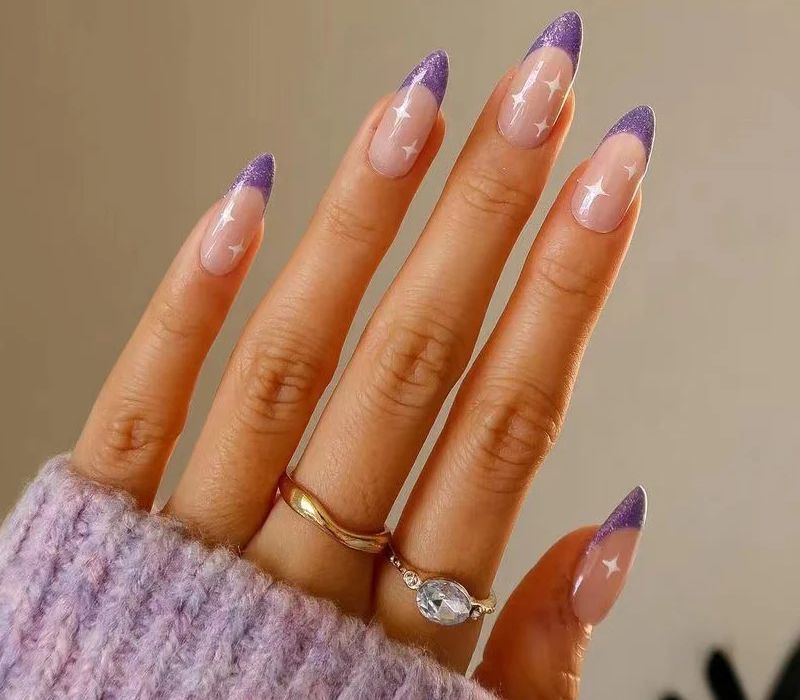
Purple French Tip Nails
Want a chic yet bold look? Purple French tip nails are the perfect mix of classy and trendy! With a nude base and glossy purple nails, this style adds a touch of elegance to your manicure. The abstract lines and gradient effect make it a must-try for the autumn season.
Imagine your nails catching the light, showing off that sleek purple design—stunning, right? Whether you love deep shades or soft lavender hues, this look is all about style and confidence. Ready to rock it?
How to Achieve This Look
1️⃣ Prep Your Nails: Start with clean, filed nails. Apply a base coat for a smooth surface and nail protection.
2️⃣ Base Color: Choose a nude or light pink shade for the base. Apply and let it dry or cure under a UV/LED lamp.
3️⃣ Perfect Your Tips: Use purple polish to create French tips. You can go for straight tips, a gradient (ombré) effect, or a sleek V-shape.
4️⃣ Add Details: For a trendy touch, use a fine brush to add abstract purple lines or swirls on the tips.
5️⃣ Seal and Shine: Apply a glossy top coat to lock in the design and boost the shine. Cure it if using a gel top coat.
Quick Tip: Use French tip nail guides or tape for perfectly crisp lines without the hassle.
READ ALSO: French Tip Nail Ideas Perfect for Fall
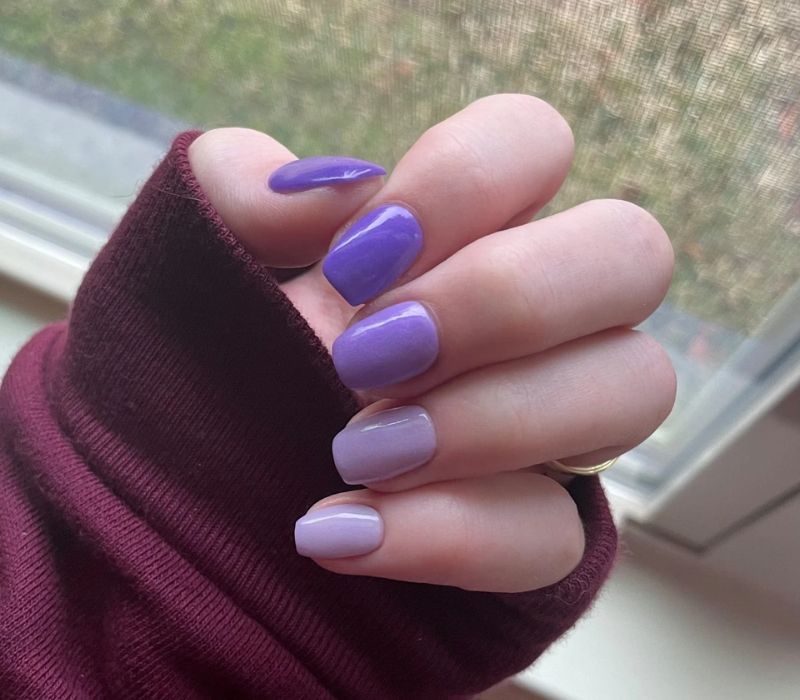
Purple ombre nails
Imagine looking at your nails and seeing a soft lavender base melting into a deep purple tip—pure elegance and creativity at your fingertips! Purple ombre nails are the perfect mix of luxury and mystery, giving you a look that feels both dreamy and bold.
If you love a delicate, feminine touch, this design is for you! The smooth color transition adds a touch of grace, making your manicure stand out effortlessly. Ready to try this chic trend and give your nails the royal treatment?
How to Achieve This Look
1️⃣ Prep Your Nails: Start clean and filed. Apply a base coat to protect your nails.
2️⃣ Choose Your Shades: Pick two purple tones—a light lavender and a rich deep purple.
3️⃣ Create the Gradient: Use a makeup sponge to gently dab the light lavender on the base of your nail, blending into the deep purple toward the tips. Repeat until you get a smooth transition.
4️⃣ Clean Edges: Use a small brush dipped in nail polish remover to tidy up around the cuticles.
5️⃣ Finish with Shine: Apply a glossy top coat to blend colors further and add lasting shine.
Pro Tip: Use thin layers for a more natural ombre effect and faster drying.
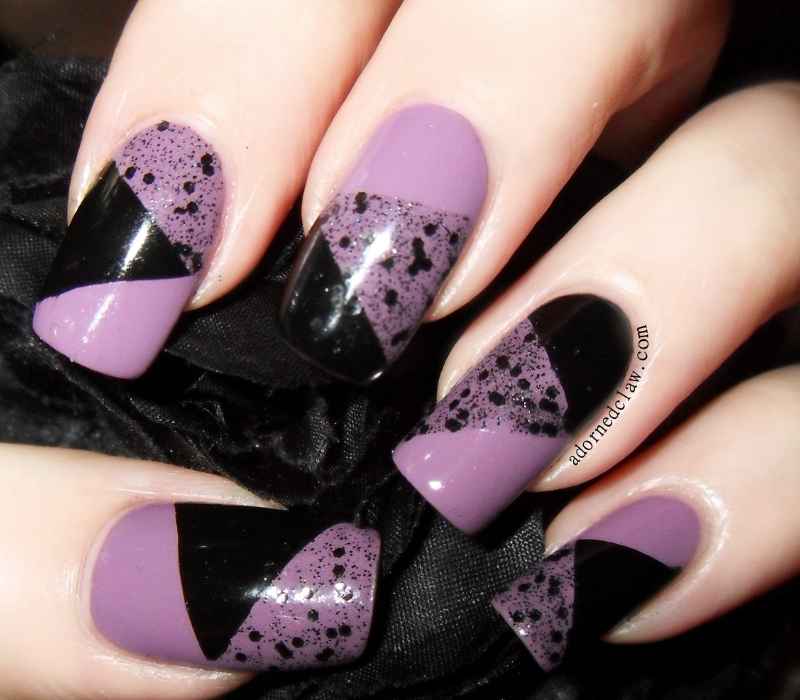
Black and Purple Nails
Why wait for a spooky season when you can rock black and purple nails anytime? Whether you’re dressing up for October 31st or just love a spooky-chic vibe, these nails are a statement. From ghostly designs to vampire-inspired art, they add a touch of mystery and fun to your look.
Think of Jack Skellington, Count Dracula, or even a haunted night sky—these nail designs capture the spirit of darkness in the coolest way. If you’re ready to embrace the dark and bold, why not start planning your spooky manicure now?
How to Achieve This Look
1️⃣ Prepare Your Nails: Clean and shape your nails, then apply a base coat for protection.
2️⃣ Pick Your Colors: Choose a deep black polish and a vibrant or muted purple shade.
3️⃣ Create Your Design:
- Paint some nails black and others purple for contrast, or
- Use purple nails with black accents like stripes, dots, or spooky silhouettes (like bats or moons).
4️⃣ Add Details: Use a thin nail brush or nail art pen for intricate designs—think ghosts, stars, or spider webs.
5️⃣ Seal the Look: Finish with a glossy or matte top coat depending on your style preference.
Pro Tip: Keep nail art simple but striking to balance the dark and colorful tones.
READ ALSO: 30 Best Black and White Nails Designs for 2025
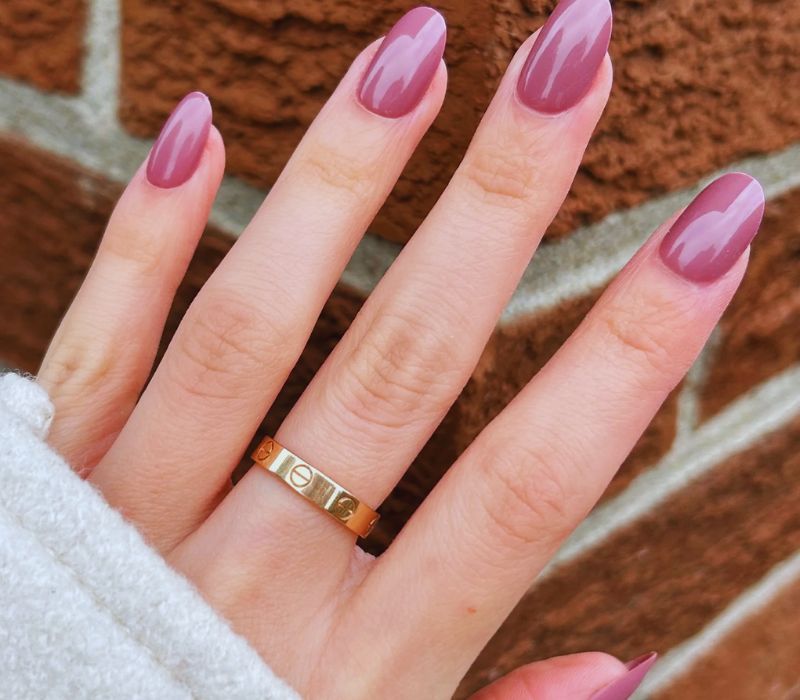
Mauve Nails
There’s something effortlessly chic about mauve nails. The soft, muted tone makes them perfect for any occasion, while a silver half-moon accent adds just the right amount of shine. It’s the perfect mix of cozy and glam, giving your nails a stylish yet understated look without going full disco.
How to Achieve This Look
1️⃣ Prep Your Nails: Start by cleaning and shaping your nails. Apply a base coat to protect your nails and ensure a smooth finish.
2️⃣ Apply Mauve Polish: Choose a muted mauve shade and paint all your nails evenly with two coats for full coverage.
3️⃣ Create the Half-Moon Accent: Using a small brush or nail vinyl guides, apply silver polish at the base of each nail in a half-moon shape.
4️⃣ Let It Dry: Allow the silver polish to dry fully to avoid smudging.
5️⃣ Seal Your Mani: Finish with a clear glossy top coat to add shine and protect your design.
Tip: Use high-quality polish for a smooth finish and longer-lasting results.
Purple & Gold
The combination of purple nails and gold accents is bold yet sophisticated. This fall power combo strikes the perfect balance between elegance and edginess. The gold detailing adds just the right amount of flashy charm, making your manicure stand out effortlessly.
How to Achieve This Look
1️⃣ Prep Your Nails: Clean, file, and apply a base coat to protect your nails.
2️⃣ Apply Purple Polish: Use a deep or vibrant purple polish and paint two even coats on all nails.
3️⃣ Add Gold Accents: Use gold nail tape, stickers, or a thin brush with gold polish to create lines, dots, or geometric shapes on a few accent nails.
4️⃣ Dry Completely: Let the gold details dry well to avoid smudges.
5️⃣ Seal with Top Coat: Finish with a clear top coat for shine and durability.
Pro Tip: Keep the gold details minimal for a modern, sophisticated look that stands out.
Deep Lilac
If dark purple feels too intense, deep lilac is the perfect alternative. It has a softer, more subtle vibe, but the glitter sparkle ensures it still grabs attention. Whether you’re keeping things casual or dressing up, this shade brings just the right touch of magic.
How to Achieve This Look
1️⃣ Prep Your Nails: Clean and file nails, then apply a base coat to protect them.
2️⃣ Apply Deep Lilac Polish: Paint two even coats of deep lilac polish for a smooth, rich color.
3️⃣ Add Glitter Sparkle: Use a fine glitter top coat or lightly dab glitter polish on tips or accent nails for a delicate shimmer.
4️⃣ Let It Dry: Allow your nails to dry fully between coats to avoid smudging.
5️⃣ Seal with Top Coat: Finish with a clear top coat to lock in shine and extend wear.
Pro Tip: For extra sparkle, add a glitter accent nail on your ring finger to keep the look balanced and chic.
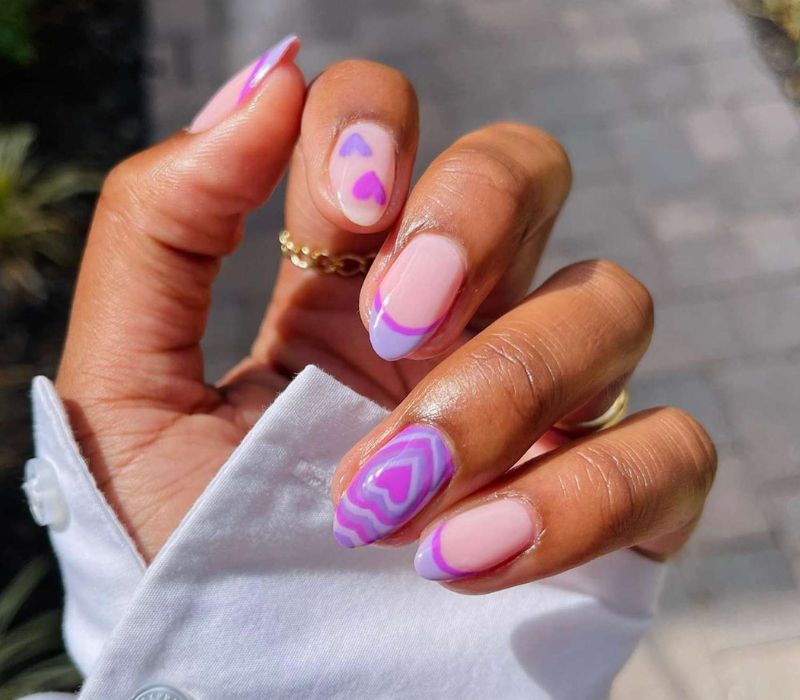
Abstract Frenchies
Classic French tips are always stylish, but adding an abstract purple twist makes them even better. This classy yet artsy design is a game-changer, giving your nails a modern, effortless vibe. If you want to keep it simple yet unique, this look is definitely the way to go.
How to Achieve This Look
1️⃣ Prep Nails: Start with clean, shaped nails and apply a base coat.
2️⃣ Paint Base Color: Use a nude or soft pink polish as your base and let it dry.
3️⃣ Create Purple Tips: Instead of a straight line, paint abstract shapes or hearts using a purple polish on the tips. Feel free to mix light and dark purples for depth.
4️⃣ Add Details: Use a thin brush or nail art pen to add subtle lines or dots for an artsy touch.
5️⃣ Seal It: Finish with a glossy top coat to protect your design and add shine.
Quick Tip: Practice the abstract shapes on paper first or use nail stickers for easier application.
Coquette Nails
If you love a soft, elegant look, coquette nails are the perfect choice. Adding cute bows to a purple manicure gives off a cozy yet fashionable vibe. Inspired by Korean beauty trends, these nails are made for fall moments—whether you’re wrapped in a scarf or taking selfies at a pumpkin patch.
How to Achieve This Look
1️⃣ Prep Your Nails: Start with clean, trimmed nails. Apply a base coat to protect them.
2️⃣ Choose a Soft Purple Shade: Apply two coats of a pastel or soft purple polish for a smooth, even base.
3️⃣ Add Bow Accents: Use a thin brush or nail stickers to create tiny white or silver bows on one or two accent nails. You can also use 3D bow charms for extra dimension.
4️⃣ Seal the Design: Finish with a glossy top coat for a shiny, polished look that lasts.
5️⃣ Optional Touch: Add a hint of glitter for a sparkling effect, making the bows pop.
Quick Tip: If drawing bows feels tricky, use nail stickers for a flawless finish without the hassle.
French Nails
A twist on the classic French tips, this purple upgrade blends light and dark shades for a sophisticated yet modern feel. The mix of tones makes them ideal for the fall mood, keeping the look classy but never boring.
How to Achieve This Look
1️⃣ Prep Your Nails: Start with clean, shaped nails. Apply a base coat to protect your nails and ensure a smooth polish application.
2️⃣ Choose Your Shades: Pick two purple shades—one light and one dark. A soft lavender for the base and a deep plum for the tips work beautifully.
3️⃣ Create the French Tips: Use a thin brush to carefully apply the dark purple polish to the tips of your nails. For a crisp line, you can use French tip guides or nail stickers.
4️⃣ Add a Glossy Finish: Seal your design with a clear, glossy top coat for a long-lasting, shiny look.
5️⃣ Optional Design: For an extra touch, you can add a thin metallic silver line between the tip and base for a chic, stylish accent.

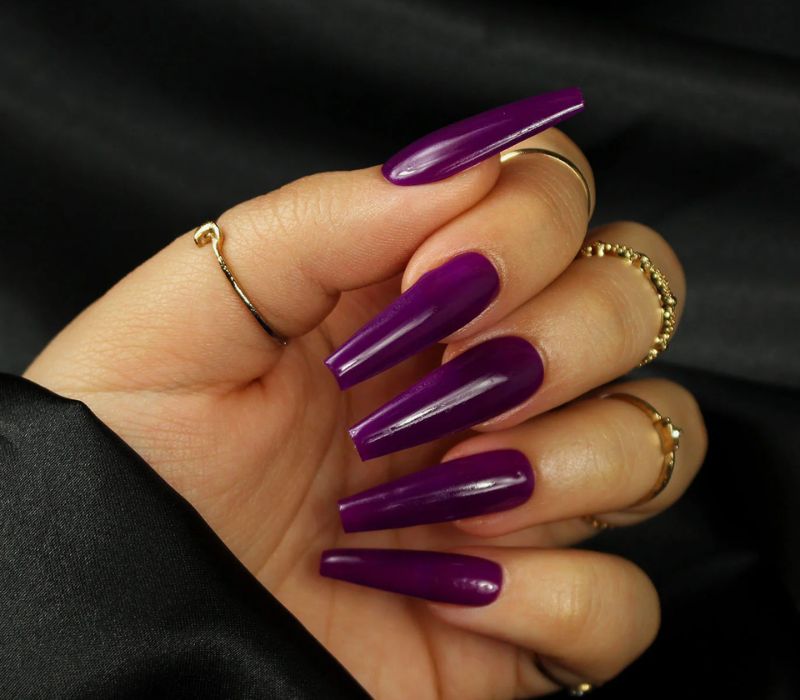
Plum Nails
When in doubt, go for plum nails. This deep, rich shade is the ultimate fall go-to, offering a chic and simple elegance. It pairs effortlessly with any fall wardrobe, making it a must-have color for the season.
How to Achieve This Look
1️⃣ Prep Your Nails: Begin with clean, filed nails. Apply a base coat to protect your natural nails and ensure smooth application.
2️⃣ Pick Your Plum Shade: Choose a rich, dark plum polish. Make sure it’s a high-quality formula for even coverage and long-lasting wear.
3️⃣ Apply the Color: Paint your nails with two thin coats of the plum polish. Let each coat dry completely before applying the next.
4️⃣ Seal with Top Coat: Use a glossy top coat for a shiny finish. For a matte look, switch to a matte top coat for a trendy twist.
5️⃣ Optional Accent: Add a touch of glitter to one or two nails for a subtle, festive flair. Gold or silver accents work beautifully with plum.
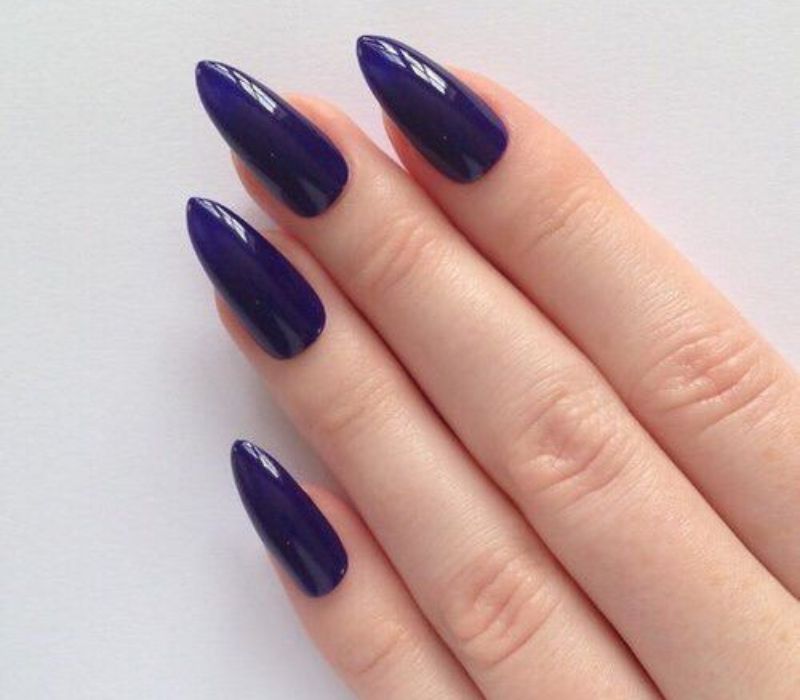
Deep Purple Stiletto Nail Art
Are you ready to make a statement? Dark purple nails with a high-gloss finish are perfect for those who love bold and fierce styles. The stiletto shape, with its long, sharply pointed tips, adds that extra drama to your look. Whether you’re dressing up for a night out or embracing the spooky season, these nails will have all eyes on you. Would you dare to try this fierce design?
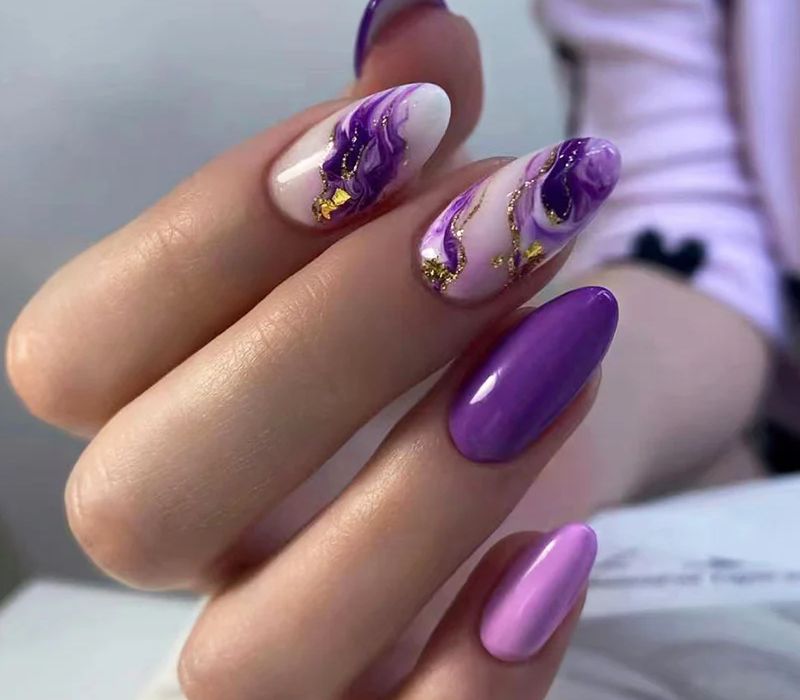
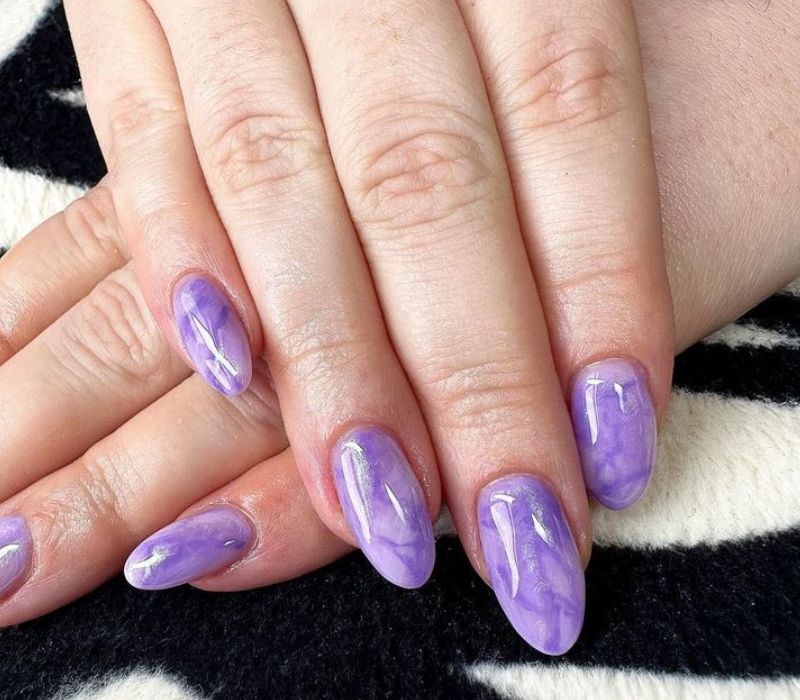
Purple Marble Swirl
Imagine a dreamy purple marble swirl on medium-length, square-shaped nails—pure elegance with a twist! The mix of different purple shades creates a mesmerizing fluid pattern that feels almost magical. These moody colors make this design a must-have for the autumn season. Wouldn’t these nails look stunningly wrapped around your favorite fall drink?
How to Achieve This Look
1️⃣ Prep Your Nails: Start by shaping your nails into the iconic stiletto shape—long and sharply pointed. If your natural nails aren’t long enough, use nail extensions.
2️⃣ Choose Your Deep Purple Shade: Pick a rich, dark purple polish with a high-gloss finish for that bold look. Gel polish is recommended for a longer-lasting effect.
3️⃣ Apply the Base Coat: Protect your nails with a clear base coat. Let it dry completely before moving to the next step.
4️⃣ Paint Your Nails: Apply two thin coats of the deep purple polish, allowing each layer to dry before adding the next.
5️⃣ Top Coat for Shine: Use a glossy top coat for that mirror-like shine. Cure it under a UV/LED lamp if using gel polish for a durable, chip-resistant finish.
6️⃣ Optional Accents: Want extra flair? Add tiny silver studs, dark glitter, or even a thin gold line along the edges for a striking, luxurious touch.
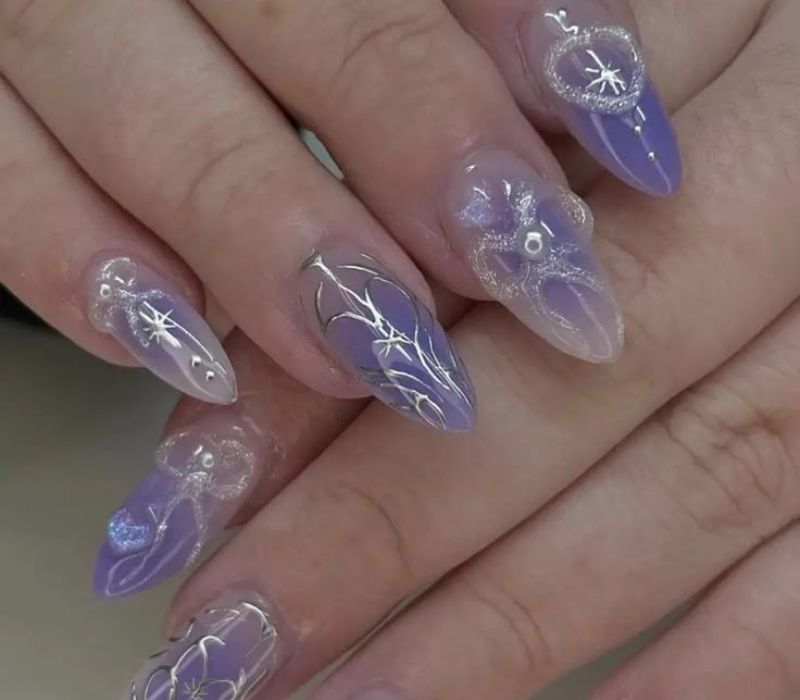
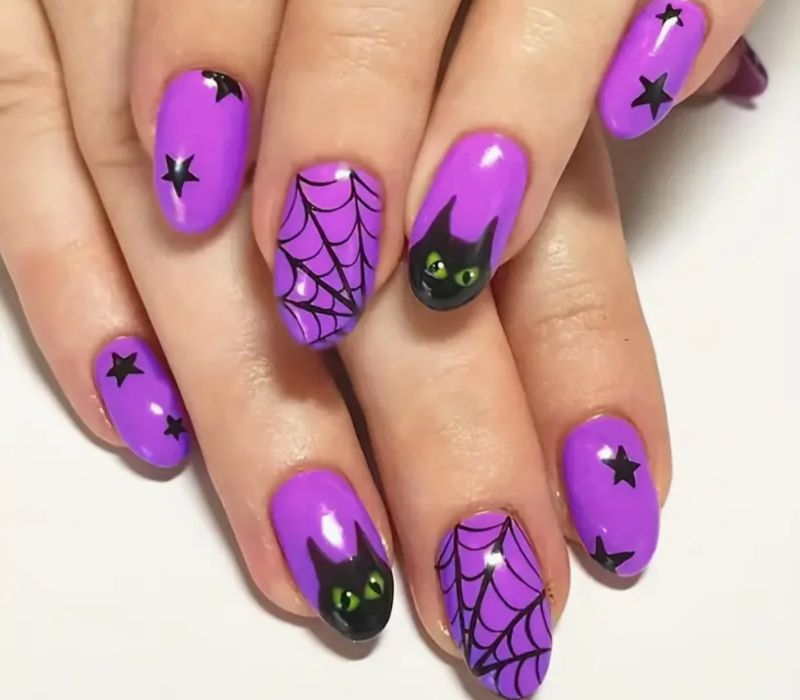
Spooky Purple Nail Art
If you love a little mystery, purple-themed designs on medium-length, almond-shaped nails bring the perfect mix of fun and elegance. Think glittery dark purple, purple marble, and a nude base with a spider web—spooky yet stylish! Whether you’re going for a gothic vibe or just love a touch of Halloween all year round, this look is a must-try. Which design speaks to your spooky side?
How to Achieve This Look
1️⃣ Shape Your Nails: Go for a medium-length almond shape, which is perfect for both elegance and versatility.
2️⃣ Pick Your Base Colors: Choose a mix of dark purple, lavender, and nude polish. This gives your nails a mysterious yet stylish contrast.
3️⃣ Create the Designs:
- For Glittery Purple, use a dark purple base and top it with a fine purple glitter polish.
- For Purple Marble, use a white or light purple base and swirl in darker purple shades using a thin nail brush or a marble tool.
- For the Spider Web Accent, start with a nude or sheer base, then use a thin nail brush and white or black polish to draw delicate spider web patterns.
4️⃣ Finish with a Top Coat: Protect your designs with a glossy top coat, making them last longer and giving them a stunning shine.
5️⃣ Optional Embellishments: Add small silver studs, rhinestones, or even tiny bat stickers for an extra spooky touch.
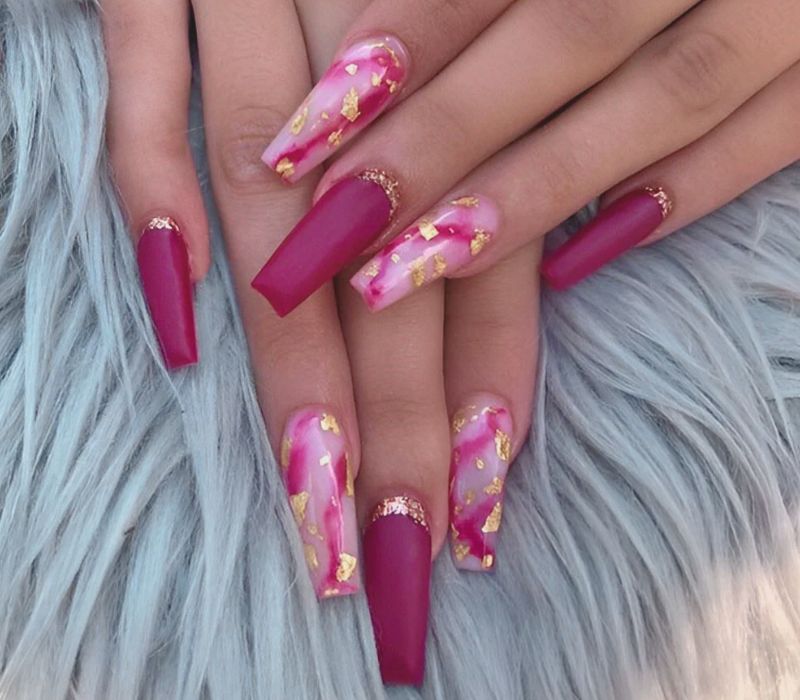
Maroon and Pink Nail Art
Looking for a chic and elegant mix? Almond-shaped nails in dark purple and soft pink with gold glitter accents bring a sophisticated touch. Picture one nail completely covered in glitter while others shine with glittery tips or maroon French tips. It’s a subtle yet eye-catching design that’s perfect for any occasion. How would you style this glamorous look?
How to Achieve This Look
1️⃣ Shape Your Nails: Go for an almond shape, which offers a stylish and feminine touch.
2️⃣ Choose Your Base Colors: Apply a soft pink polish on most of your nails, while selecting maroon for one or two accent nails.
3️⃣ Add Glitter Accents:
- For a touch of luxury, cover one nail entirely in gold glitter polish.
- Add glittery tips on the pink nails for a subtle sparkle.
- If you prefer, try a maroon French tip with a thin glitter line.
4️⃣ Finish with a Top Coat: Seal your design with a glossy top coat for long-lasting shine and protection.
5️⃣ Optional Detailing: Add tiny gold gems or lines for a more sophisticated touch.
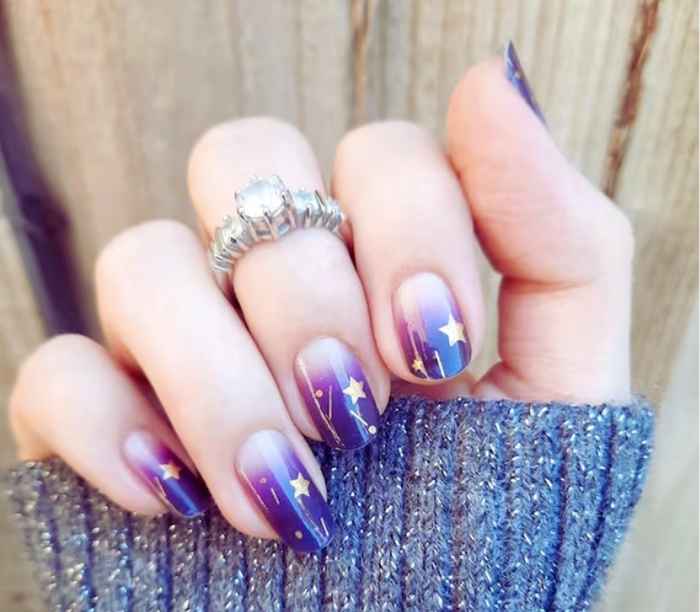
Starry Night Nail Art
Imagine your nails twinkling like the night sky! A rich purple base on long, stiletto-shaped nails creates a bold and mysterious look. Add holographic star stickers for a touch of magic, making this dark purple nail design a dreamy choice. The celestial vibes paired with the majestic feel of deep purple give you a perfect mix of elegance and fun.
How to Achieve This Look
1️⃣ Prep Your Nails: Shape them into long, stiletto tips for a dramatic effect.
2️⃣ Apply the Base Color: Choose a rich, dark purple polish. Make sure to apply two coats for full coverage and depth.
3️⃣ Add the Stars: Once the base is dry, use holographic star stickers. Place them randomly for a dreamy, scattered look, or create a constellation pattern for extra magic.
4️⃣ Top with a Glossy Coat: Seal the design with a glossy top coat to enhance the shine and keep the stars in place.
5️⃣ Optional Touch: For a galaxy effect, dab a bit of shimmering silver or blue polish around the stars with a makeup sponge.
Purple Geometric Nail Art
If you love bold and stylish nails, this dark purple nail design is for you! Featuring geometric designs on long, coffin-shaped nails, this look blends deep purple and lavender with smooth gradient transitions. The mix of holographic hexagons and bold white and black lines makes your nails a true statement piece. Whether you prefer edgy or artistic styles, this set will surely turn heads!
How to Achieve This Look
1️⃣ Shape Your Nails: File your nails into long, coffin-shaped tips for a bold effect.
2️⃣ Apply the Base Color: Start with a rich dark purple polish as your base. Let it dry completely.
3️⃣ Create Geometric Patterns: Use a fine nail art brush to draw bold white and black lines, creating geometric shapes.
4️⃣ Add Lavender Touches: Carefully apply a light lavender shade inside some of the geometric shapes for contrast.
5️⃣ Include Holographic Accents: Use holographic hexagon stickers for a futuristic touch. Place them strategically inside some geometric shapes.
6️⃣ Top with a Glossy Coat: Seal your design with a glossy top coat for a shiny, polished look.
Maroon Nails with Gold Flakes
Go for elegance with dark maroon nails featuring a glossy finish on medium-length, almond-shaped nails. The gold foil flakes add a luxurious touch, making this design stand out. The combination of rich maroon and shimmering gold gives a timeless look that works for any occasion. This is your sign to choose a bold design over a simple white manicure—go for something striking!
How to Achieve This Look
1️⃣ Shape Your Nails: Start by shaping your nails into a medium-length almond shape for a classy touch.
2️⃣ Apply a Maroon Base: Choose a rich, glossy maroon nail polish. Apply two coats for full coverage, letting each coat dry completely.
3️⃣ Add Gold Foil Flakes: Use tweezers to carefully place gold foil flakes onto your nails while the polish is slightly tacky. Arrange them randomly for a natural, elegant look.
4️⃣ Seal with Top Coat: Finish with a clear, glossy top coat to lock in the gold flakes and give your nails a smooth, glass-like shine.

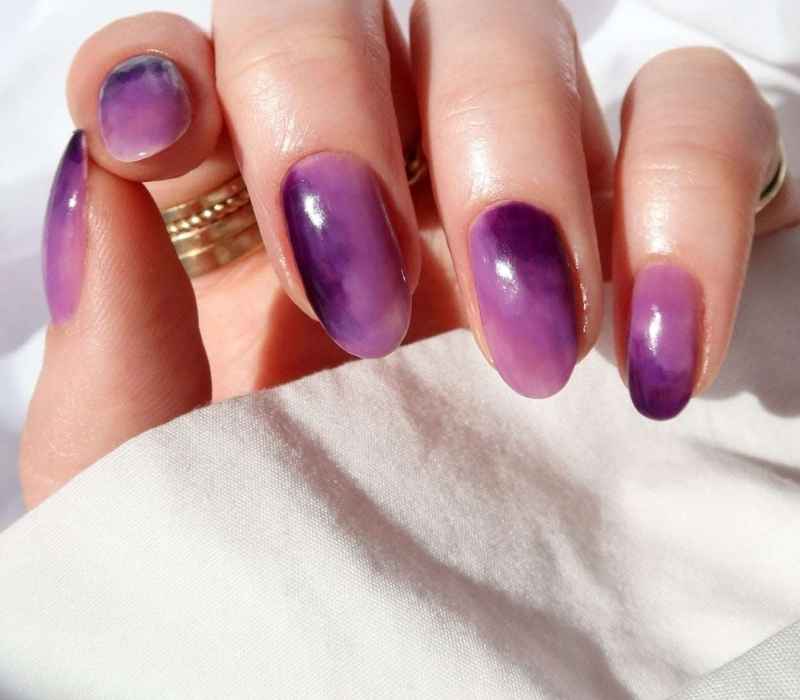
Amethyst Nails
Imagine your nails looking like real gemstones, glowing with mystical beauty. This purple-inspired design brings the elegance of amethyst to your fingertips, creating a look that’s both bold and enchanting. Perfect for those who love a touch of luxury with a hint of fall magic, these nails capture the essence of a gemstone’s natural beauty in the most stylish way!
How to Achieve This Look
1️⃣ Prep Your Nails: Start with clean, shaped nails. Almond or coffin shapes work best for a gemstone look.
2️⃣ Choose a Base Color: Apply a deep purple polish as your base. Look for a shade with a slight shimmer to mimic the glow of real amethyst.
3️⃣ Create Gemstone Texture: While the base is still wet, use a fine brush to swirl lighter purple or white polish on top. This adds a natural, crystal-like texture.
4️⃣ Add Shine and Depth: For a more realistic gem effect, layer a touch of iridescent or holographic polish lightly on the surface.
5️⃣ Seal with Top Coat: Finish with a glossy top coat for a smooth, gemstone-like finish.
No matter your style, purple nails bring the perfect mix of elegance, creativity, and boldness. From deep plum hues to shimmering chrome, there’s a look for everyone! Love a spooky vibe, a floral touch, or a glossy statement? The choice is yours!
Which purple nail design speaks to you? Glossy or matte? Dark or pastel? Tell me your favorite in the comments—I’d love to know!